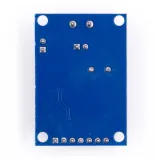
SKU: OT2083-D99 Numer artykułu: AA204 EAN: 4374044390615

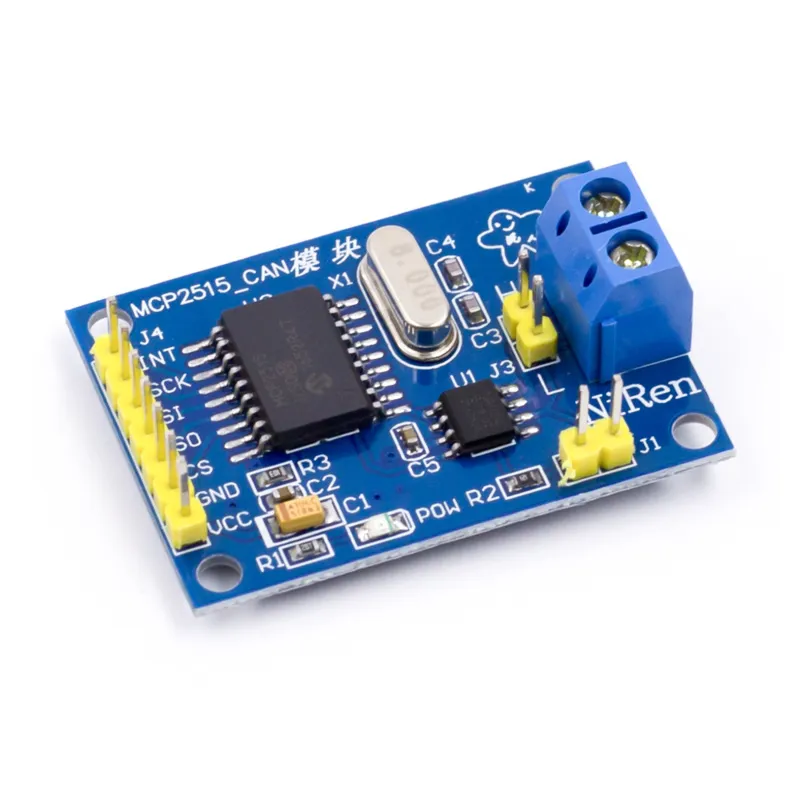
Moduł CAN-bus MCP2515 jest odpowiedni do Arduino i innych projektów z mikrokontrolerami, w których chcesz komunikować się z systemem CAN za pomocą protokołu SPI.
Obsługuje CAN V2.0B z prędkością komunikacji 1 Mb/s.
Napięcie zasilania: 5V
Interfejs: sterowany przez SPI
Wymiary: około 2,8 x 4,8 cm
Wymiary
Lengte: 4cm
Breedte: 2,8cm
Hoogte: 1,2cm
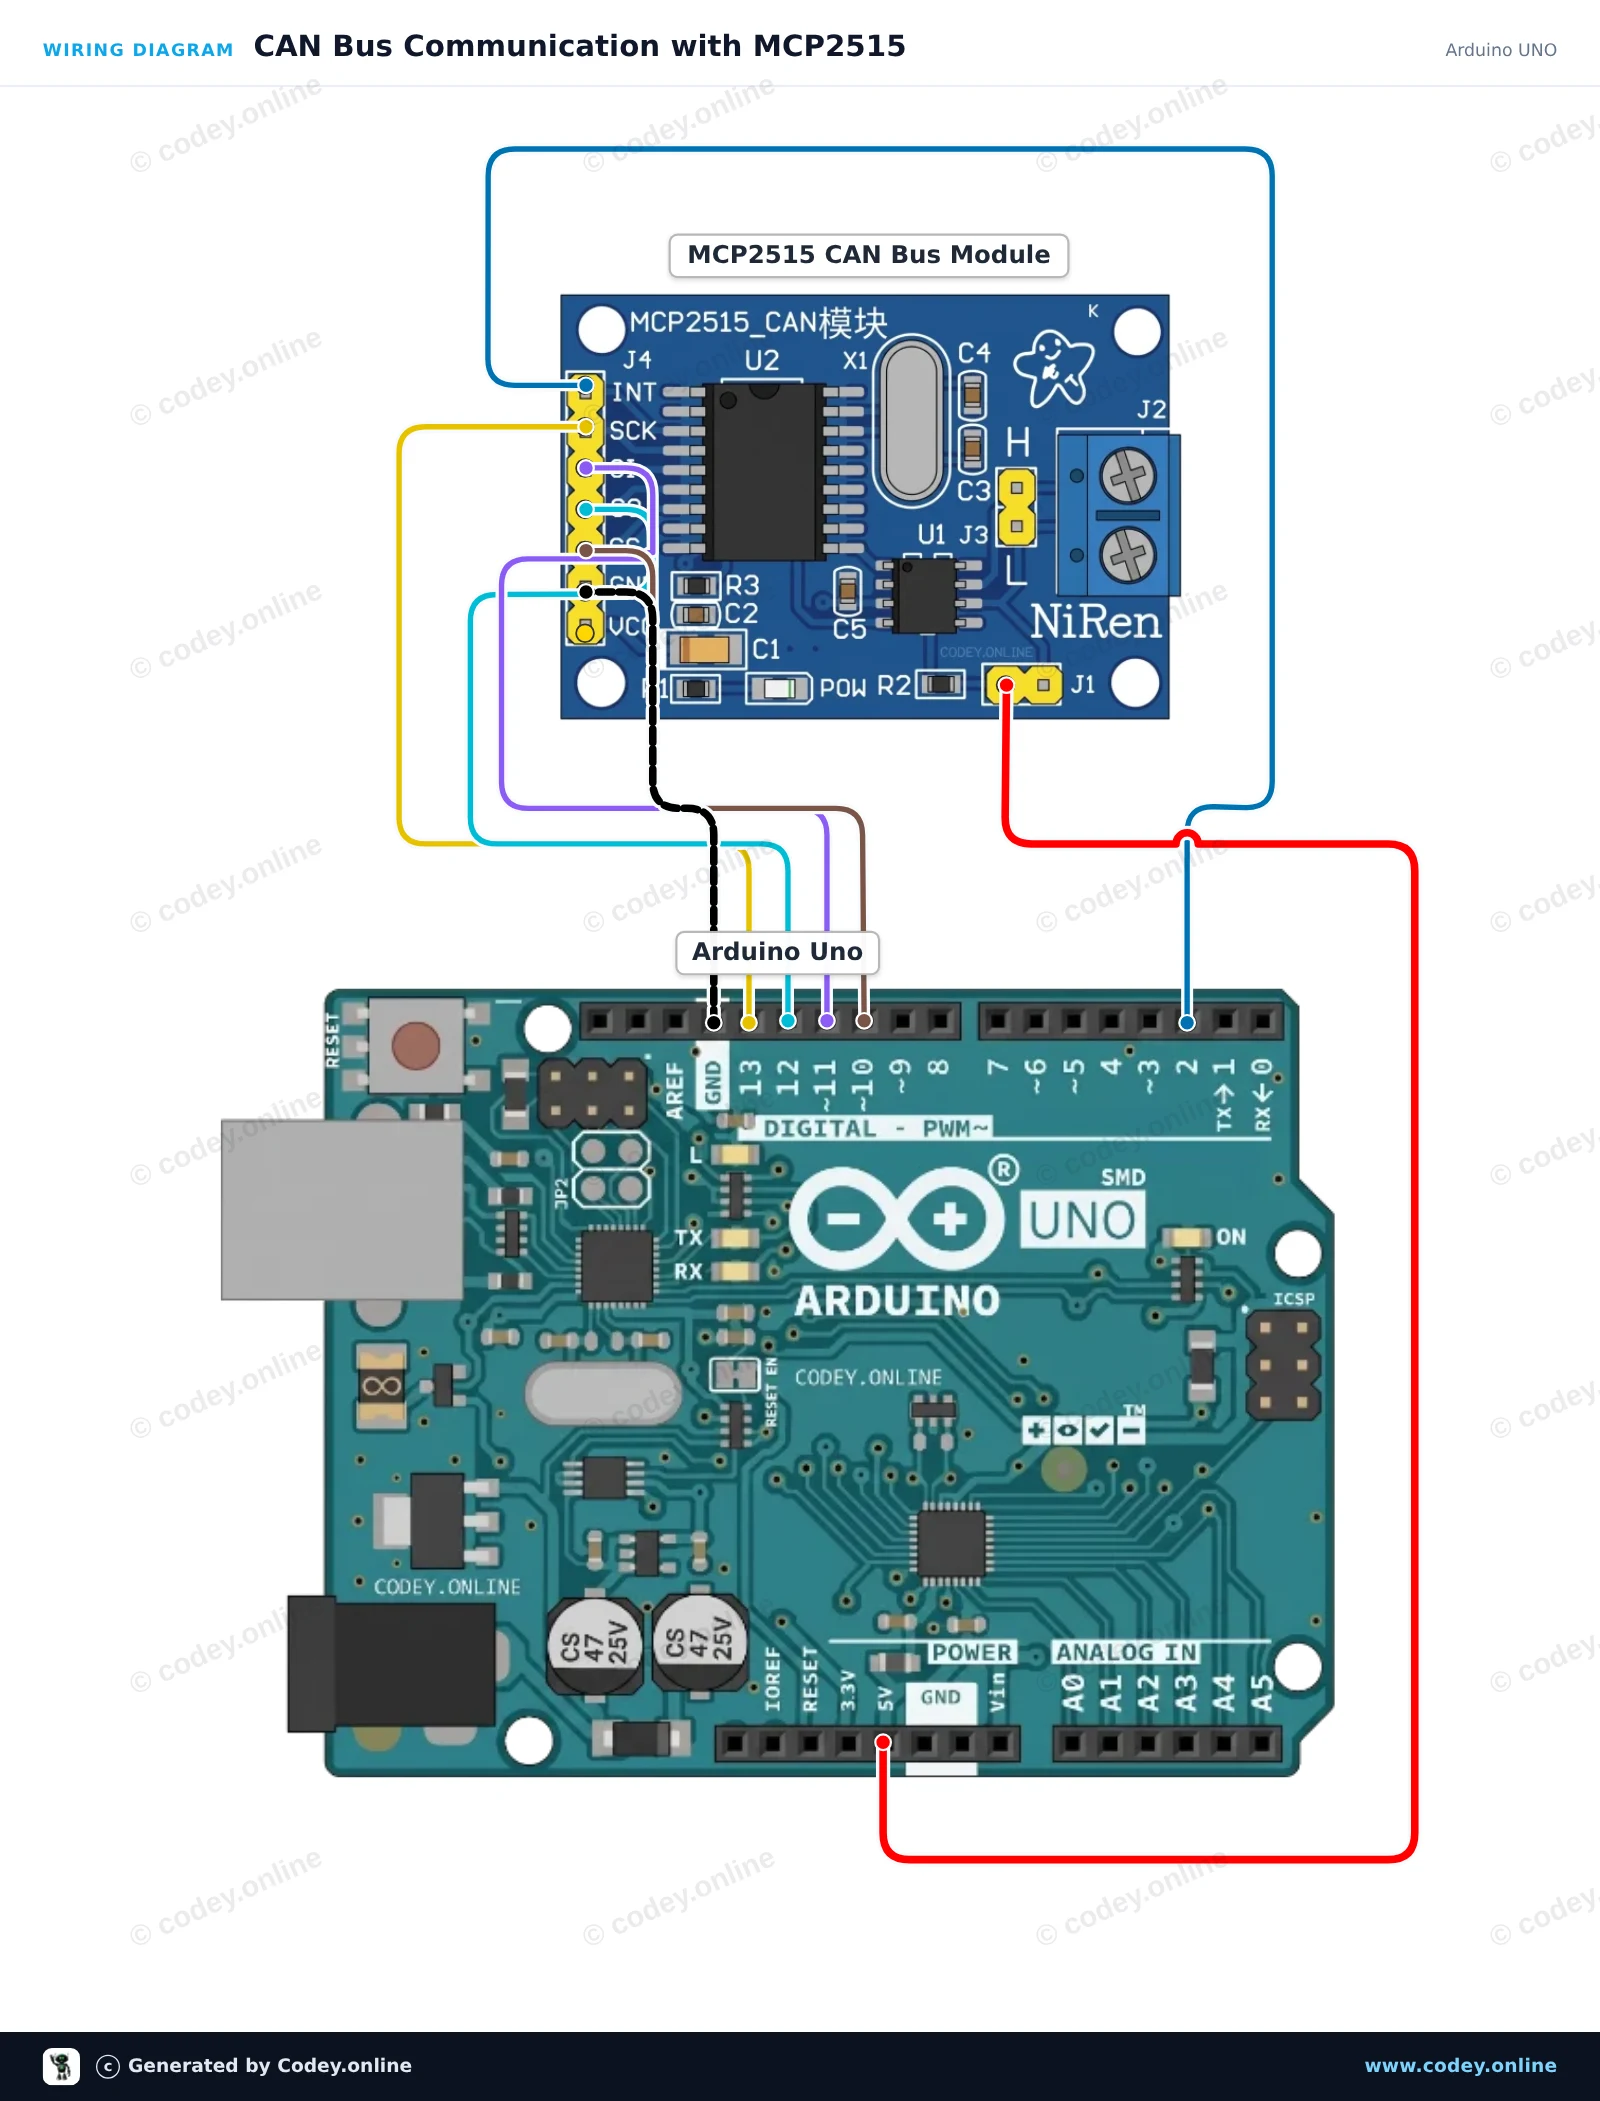
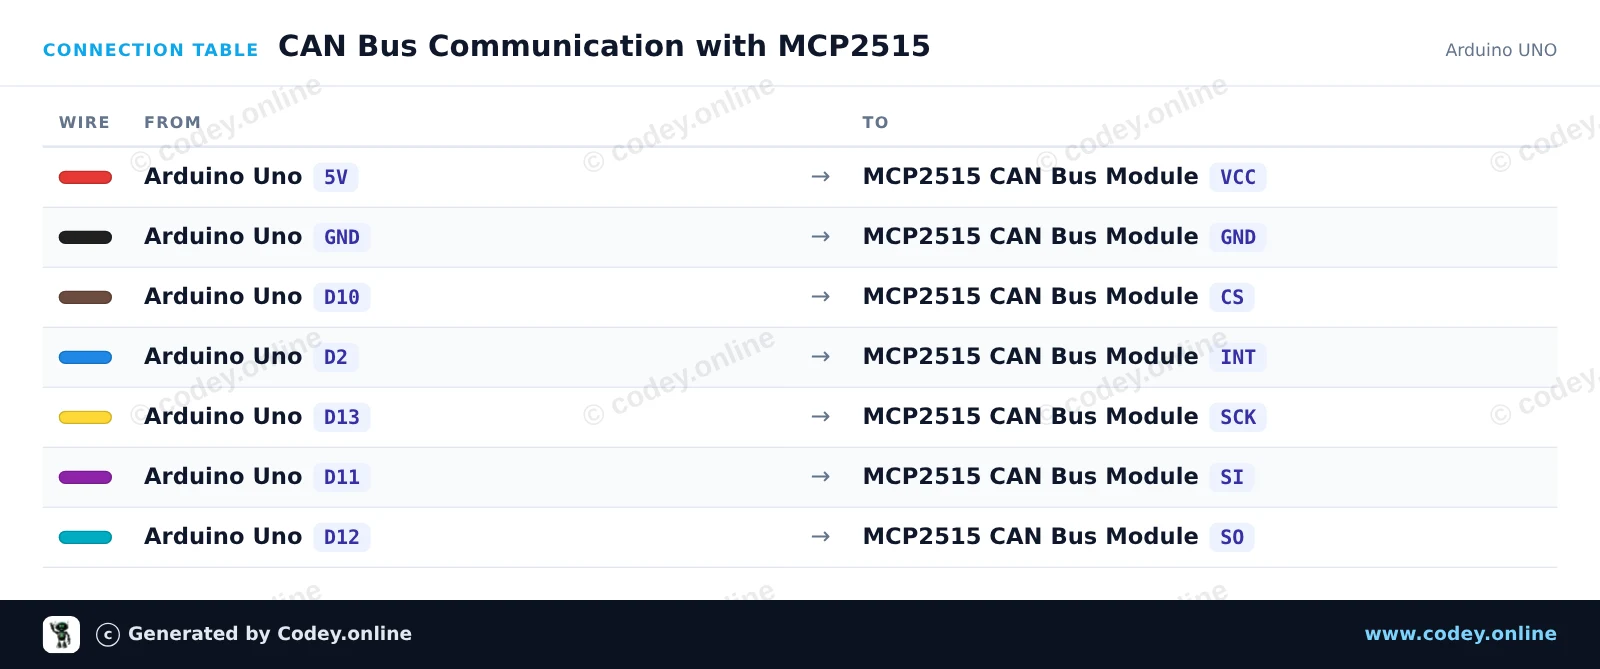
Tak podłączysz Moduł CAN-bus MCP2515 SPI 5V do Arduino UNO lub ESP32, z przykładowym szkicem, który możesz od razu wgrać.
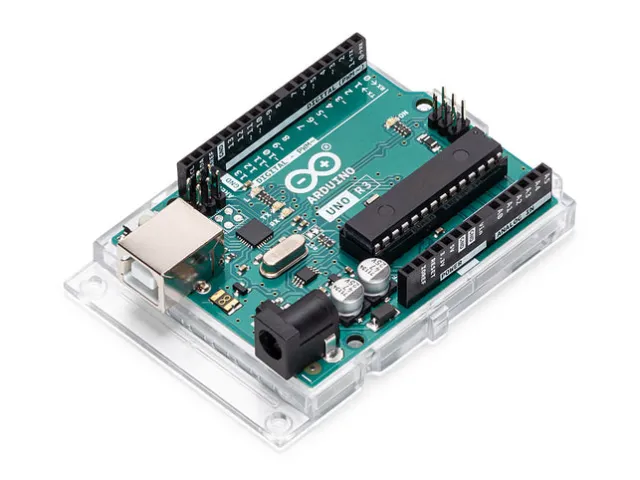
Łączy moduł magistrali CAN MCP2515 z Arduino Uno za pomocą hardware SPI. Szkic inicjalizuje kontroler CAN z prędkością 500 kbps, wysyła testową wiadomość CAN co 2 sekundy i wyświetla wszystkie odebrane ramki w Serial Monitor.
/*
 * ==================================================================
 *  Generated by Codey.online  —  https://www.codey.online
 * ==================================================================
 *  Project   : CAN Bus Communication with MCP2515
 *  Board     : Arduino UNO (arduino:avr:uno)
 *  Parts     : CAN-bus module MCP2515 SPI 5V
 *  Libraries : mcp_can 1.5.1
 *
 *  Codey Online is an AI-powered browser IDE for Arduino and ESP32.
 *  Describe your project and Codey writes the code, draws the wiring
 *  diagram and uploads it to your board, straight from the browser.
 *  This code is free to use, modify and share, without warranty.
 * ==================================================================
 */

#include <SPI.h>
#include <mcp_can.h>

const byte CAN_CS_PIN = 10;
const byte CAN_INT_PIN = 2;

MCP_CAN CAN(CAN_CS_PIN);

unsigned long lastSend = 0;

void setup() {
  Serial.begin(115200);
  pinMode(CAN_INT_PIN, INPUT);

  // Initialize MCP2515 with standard 8MHz crystal at 500 kbps
  if (CAN.begin(MCP_ANY, CAN_500KBPS, MCP_8MHZ) == CAN_OK) {
    Serial.println(F("MCP2515 initialized successfully!"));
  } else {
    Serial.println(F("MCP2515 initialization failed!"));
    while (1);
  }

  CAN.setMode(MCP_NORMAL);
  Serial.println(F("CAN controller ready in normal mode."));
}

void loop() {
  // Check for received CAN messages
  if (CAN.checkReceive() == CAN_MSGAVAIL) {
    unsigned long rxId;
    byte len = 0;
    byte rxBuf[8];

    CAN.readMsgBuf(&rxId, &len, rxBuf);

    Serial.print(F("RX -> ID: 0x"));
    Serial.print(rxId, HEX);
    Serial.print(F(" DLC: "));
    Serial.print(len);
    Serial.print(F(" Data: "));
    for (byte i = 0; i < len; i++) {
      if (rxBuf[i] < 0x10) Serial.print('0');
      Serial.print(rxBuf[i], HEX);
      Serial.print(' ');
    }
    Serial.println();
  }

  // Send a test packet every 2 seconds
  if (millis() - lastSend >= 2000) {
    lastSend = millis();
    byte txData[4] = {0xDE, 0xAD, 0xBE, 0xEF};
    byte sndStat = CAN.sendMsgBuf(0x100, 0, 4, txData);

    if (sndStat == CAN_OK) {
      Serial.println(F("TX -> Sent frame (ID: 0x100, Data: DE AD BE EF)"));
    } else {
      Serial.println(F("TX -> Error sending message"));
    }
  }
}Wymagane biblioteki: mcp_can 1.5.1
Wiring diagram and example code generated by Codey.online — https://www.codey.online
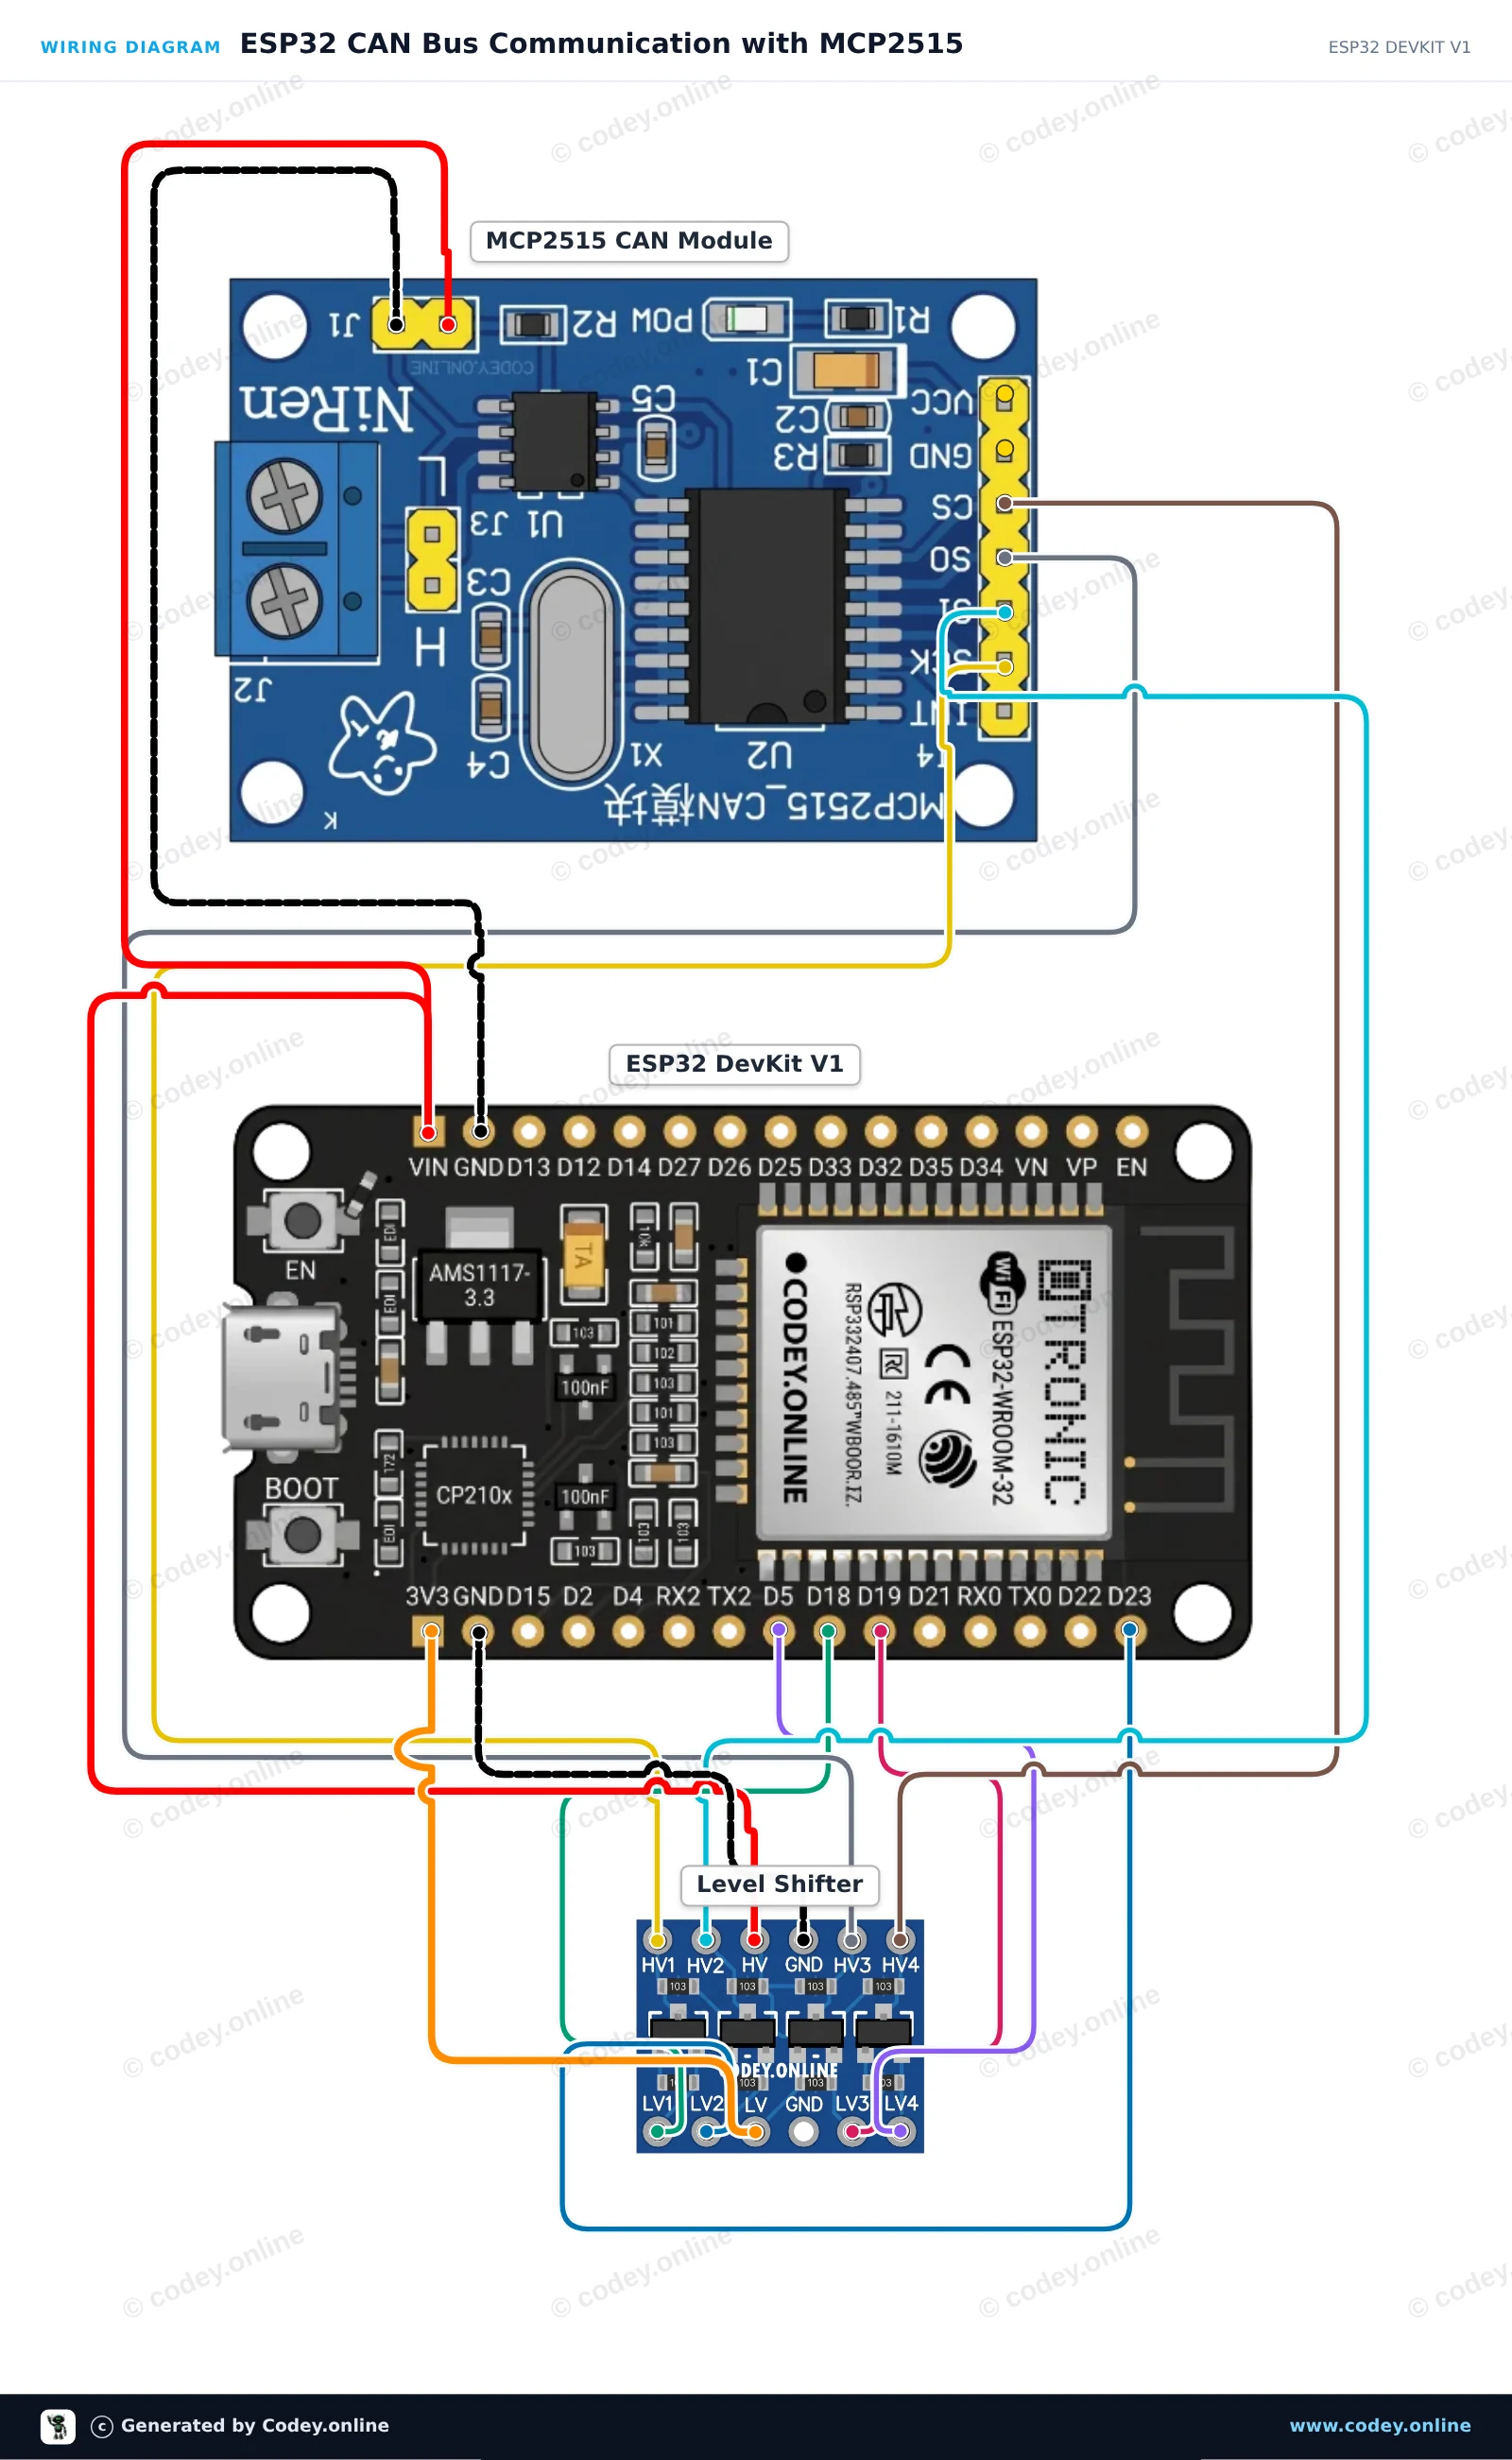
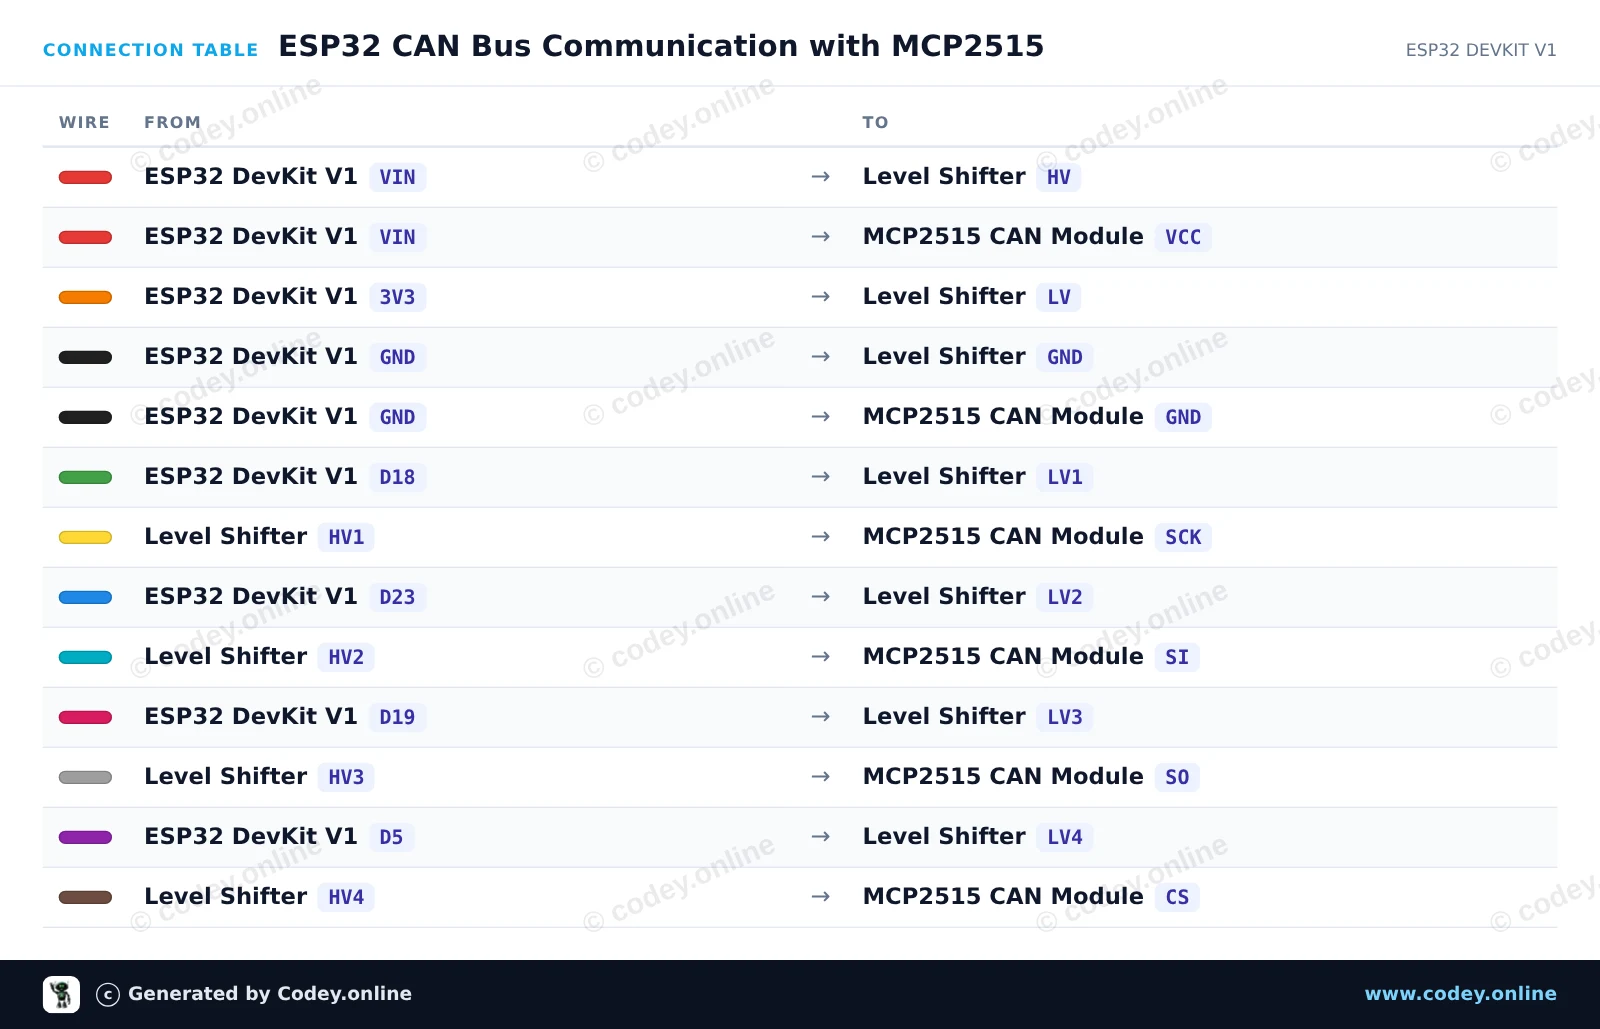
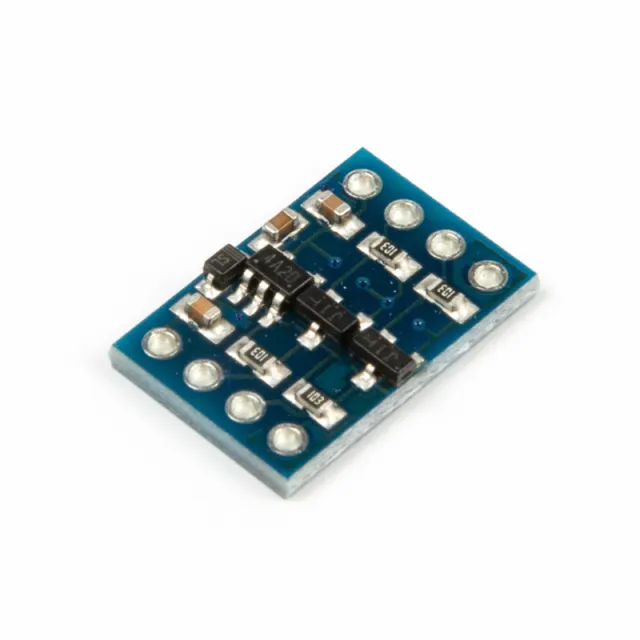
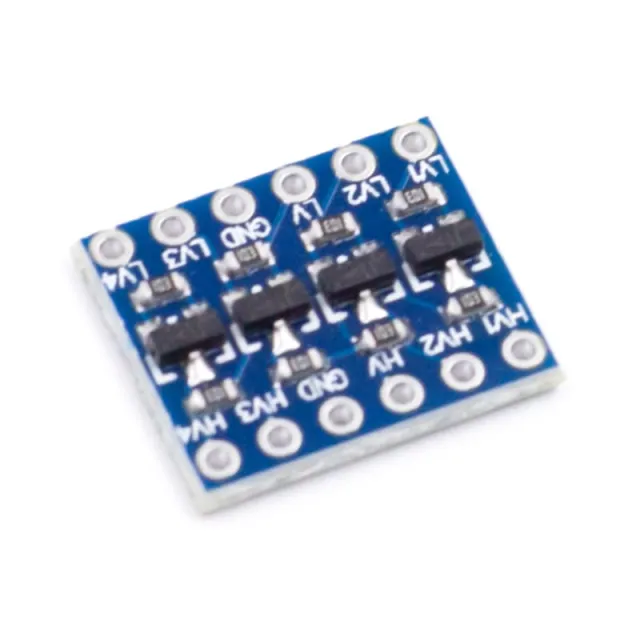
Ten układ łączy ESP32 z modułem CAN-bus MCP2515 przez SPI, wykorzystując 4-kanałowy dwukierunkowy konwerter poziomów, aby chronić logikę 3.3V ESP32 przed modułem 5V. Szkic inicjalizuje kontroler CAN z prędkością 500 kbps, wysyła testową ramkę danych CAN co dwie sekundy i wyświetla wszystkie odebrane wiadomości z magistrali CAN w Serial Monitor.
/*
 * ==================================================================
 *  Generated by Codey.online  —  https://www.codey.online
 * ==================================================================
 *  Project   : ESP32 CAN Bus Communication with MCP2515
 *  Board     : ESP32 DEVKIT V1 (esp32:esp32:esp32doit-devkit-v1)
 *  Parts     : CAN-bus module MCP2515 SPI 5V
 *  Libraries : mcp_can 1.5.1
 *
 *  Codey Online is an AI-powered browser IDE for Arduino and ESP32.
 *  Describe your project and Codey writes the code, draws the wiring
 *  diagram and uploads it to your board, straight from the browser.
 *  This code is free to use, modify and share, without warranty.
 * ==================================================================
 */

#include <SPI.h>
#include <mcp_can.h>

const int CAN_CS_PIN = 5;
MCP_CAN CAN0(CAN_CS_PIN);

void setup() {
  Serial.begin(115200);
  while (!Serial);

  // Initialize MCP2515 running at 8MHz clock and 500kbps CAN baud rate
  if (CAN0.begin(MCP_ANY, CAN_500KBPS, MCP_8MHZ) == CAN_OK) {
    Serial.println("MCP2515 Initialized Successfully!");
  } else {
    Serial.println("Error Initializing MCP2515...");
  }

  CAN0.setMode(MCP_NORMAL);
}

void loop() {
  // Prepare sample data payload (8 bytes)
  byte data[8] = {0x11, 0x22, 0x33, 0x44, 0x55, 0x66, 0x77, 0x88};

  // Send CAN message with standard ID 0x100
  byte sndStat = CAN0.sendMsgBuf(0x100, 0, 8, data);
  if (sndStat == CAN_OK) {
    Serial.println("CAN Message Sent Successfully!");
  } else {
    Serial.println("Error Sending CAN Message...");
  }

  // Check for incoming CAN messages
  if (CAN0.checkReceive() == CAN_MSGAVAIL) {
    long unsigned int rxId;
    unsigned char len = 0;
    unsigned char rxBuf[8];

    CAN0.readMsgBuf(&rxId, &len, rxBuf);

    Serial.print("Received ID: 0x");
    Serial.print(rxId, HEX);
    Serial.print(" Data: ");
    for (byte i = 0; i < len; i++) {
      Serial.print("0x");
      if (rxBuf[i] < 0x10) Serial.print("0");
      Serial.print(rxBuf[i], HEX);
      Serial.print(" ");
    }
    Serial.println();
  }

  delay(2000);
}Wymagane biblioteki: mcp_can 1.5.1
Wiring diagram and example code generated by Codey.online — https://www.codey.online





 English
  Nederlands
  Frans
Frans  Deutsch
  Italiano
  Español
  Suomi
Suomi  Dansk
Dansk  Ελληνικά
  Български
  Čeština
  Hrvatski
  Svenska
  Aileen