SKU: OT6683 Numer artykułu: XR792 EAN: 8720828223475

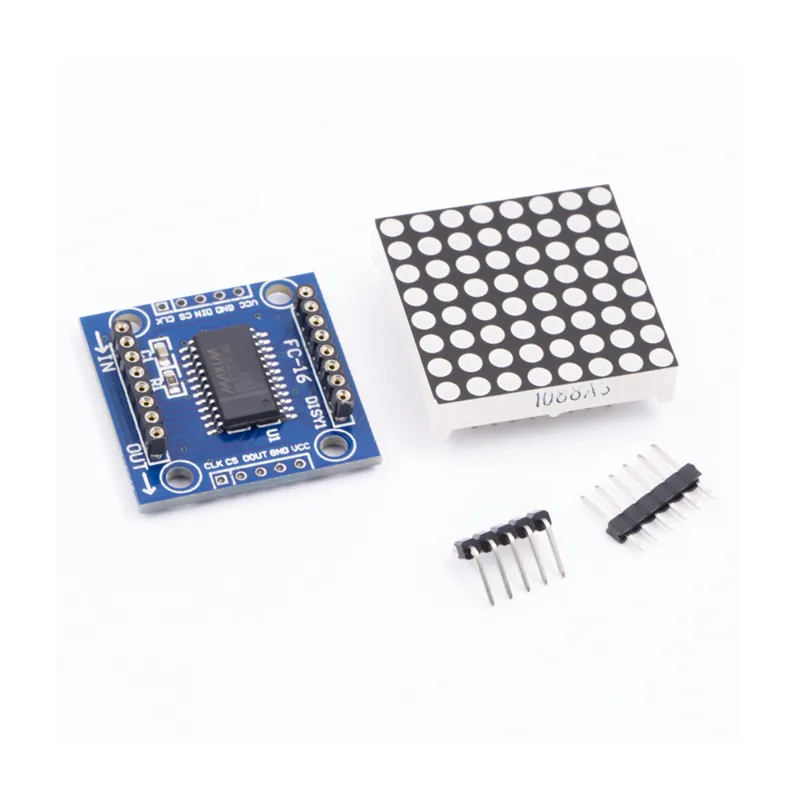
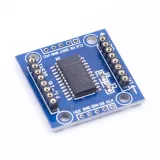
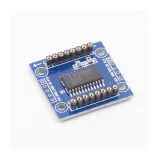
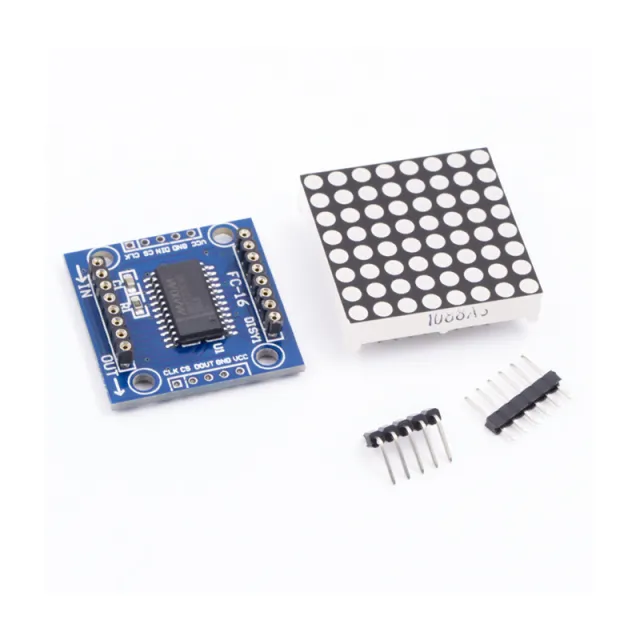
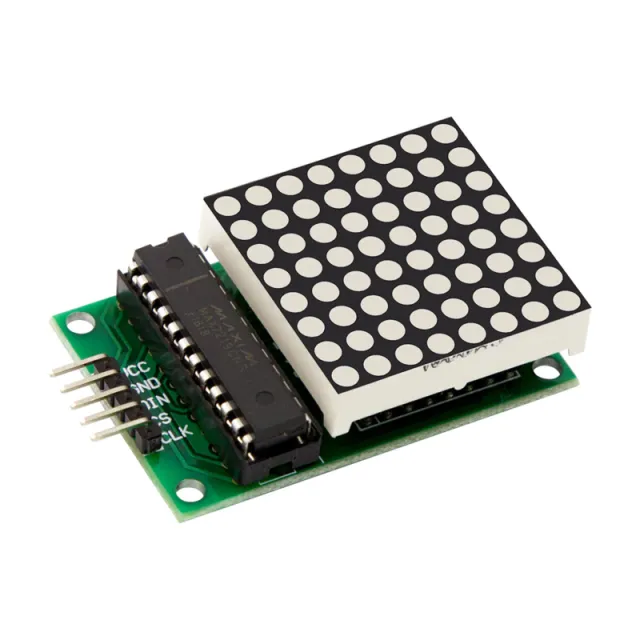
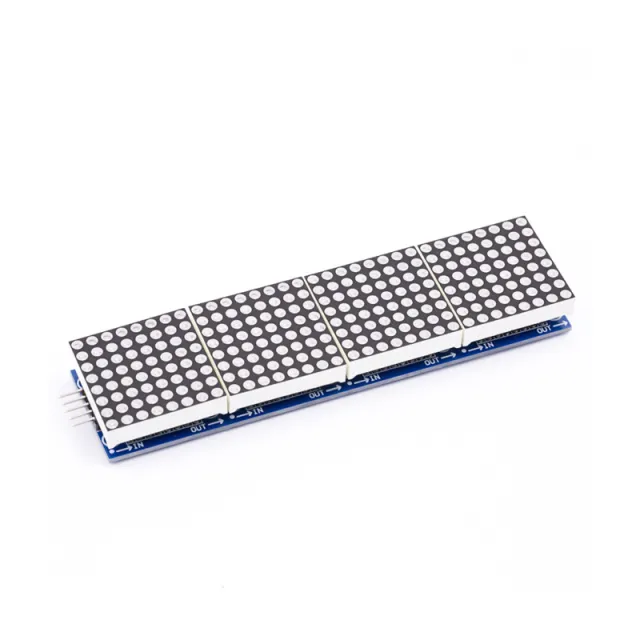
MAX7219 to układ scalony używany do sterowania panelami LED ze wspólną katodą, wyświetlaczami 7-segmentowymi oraz wskaźnikami poziomu komunikującymi się przez interfejs SPI. Ta płytka ma wyświetlacz LED matrycy punktowej 8x8. Kilka modułów można łączyć kaskadowo za pomocą złączy pinowych.
Specyfikacja:
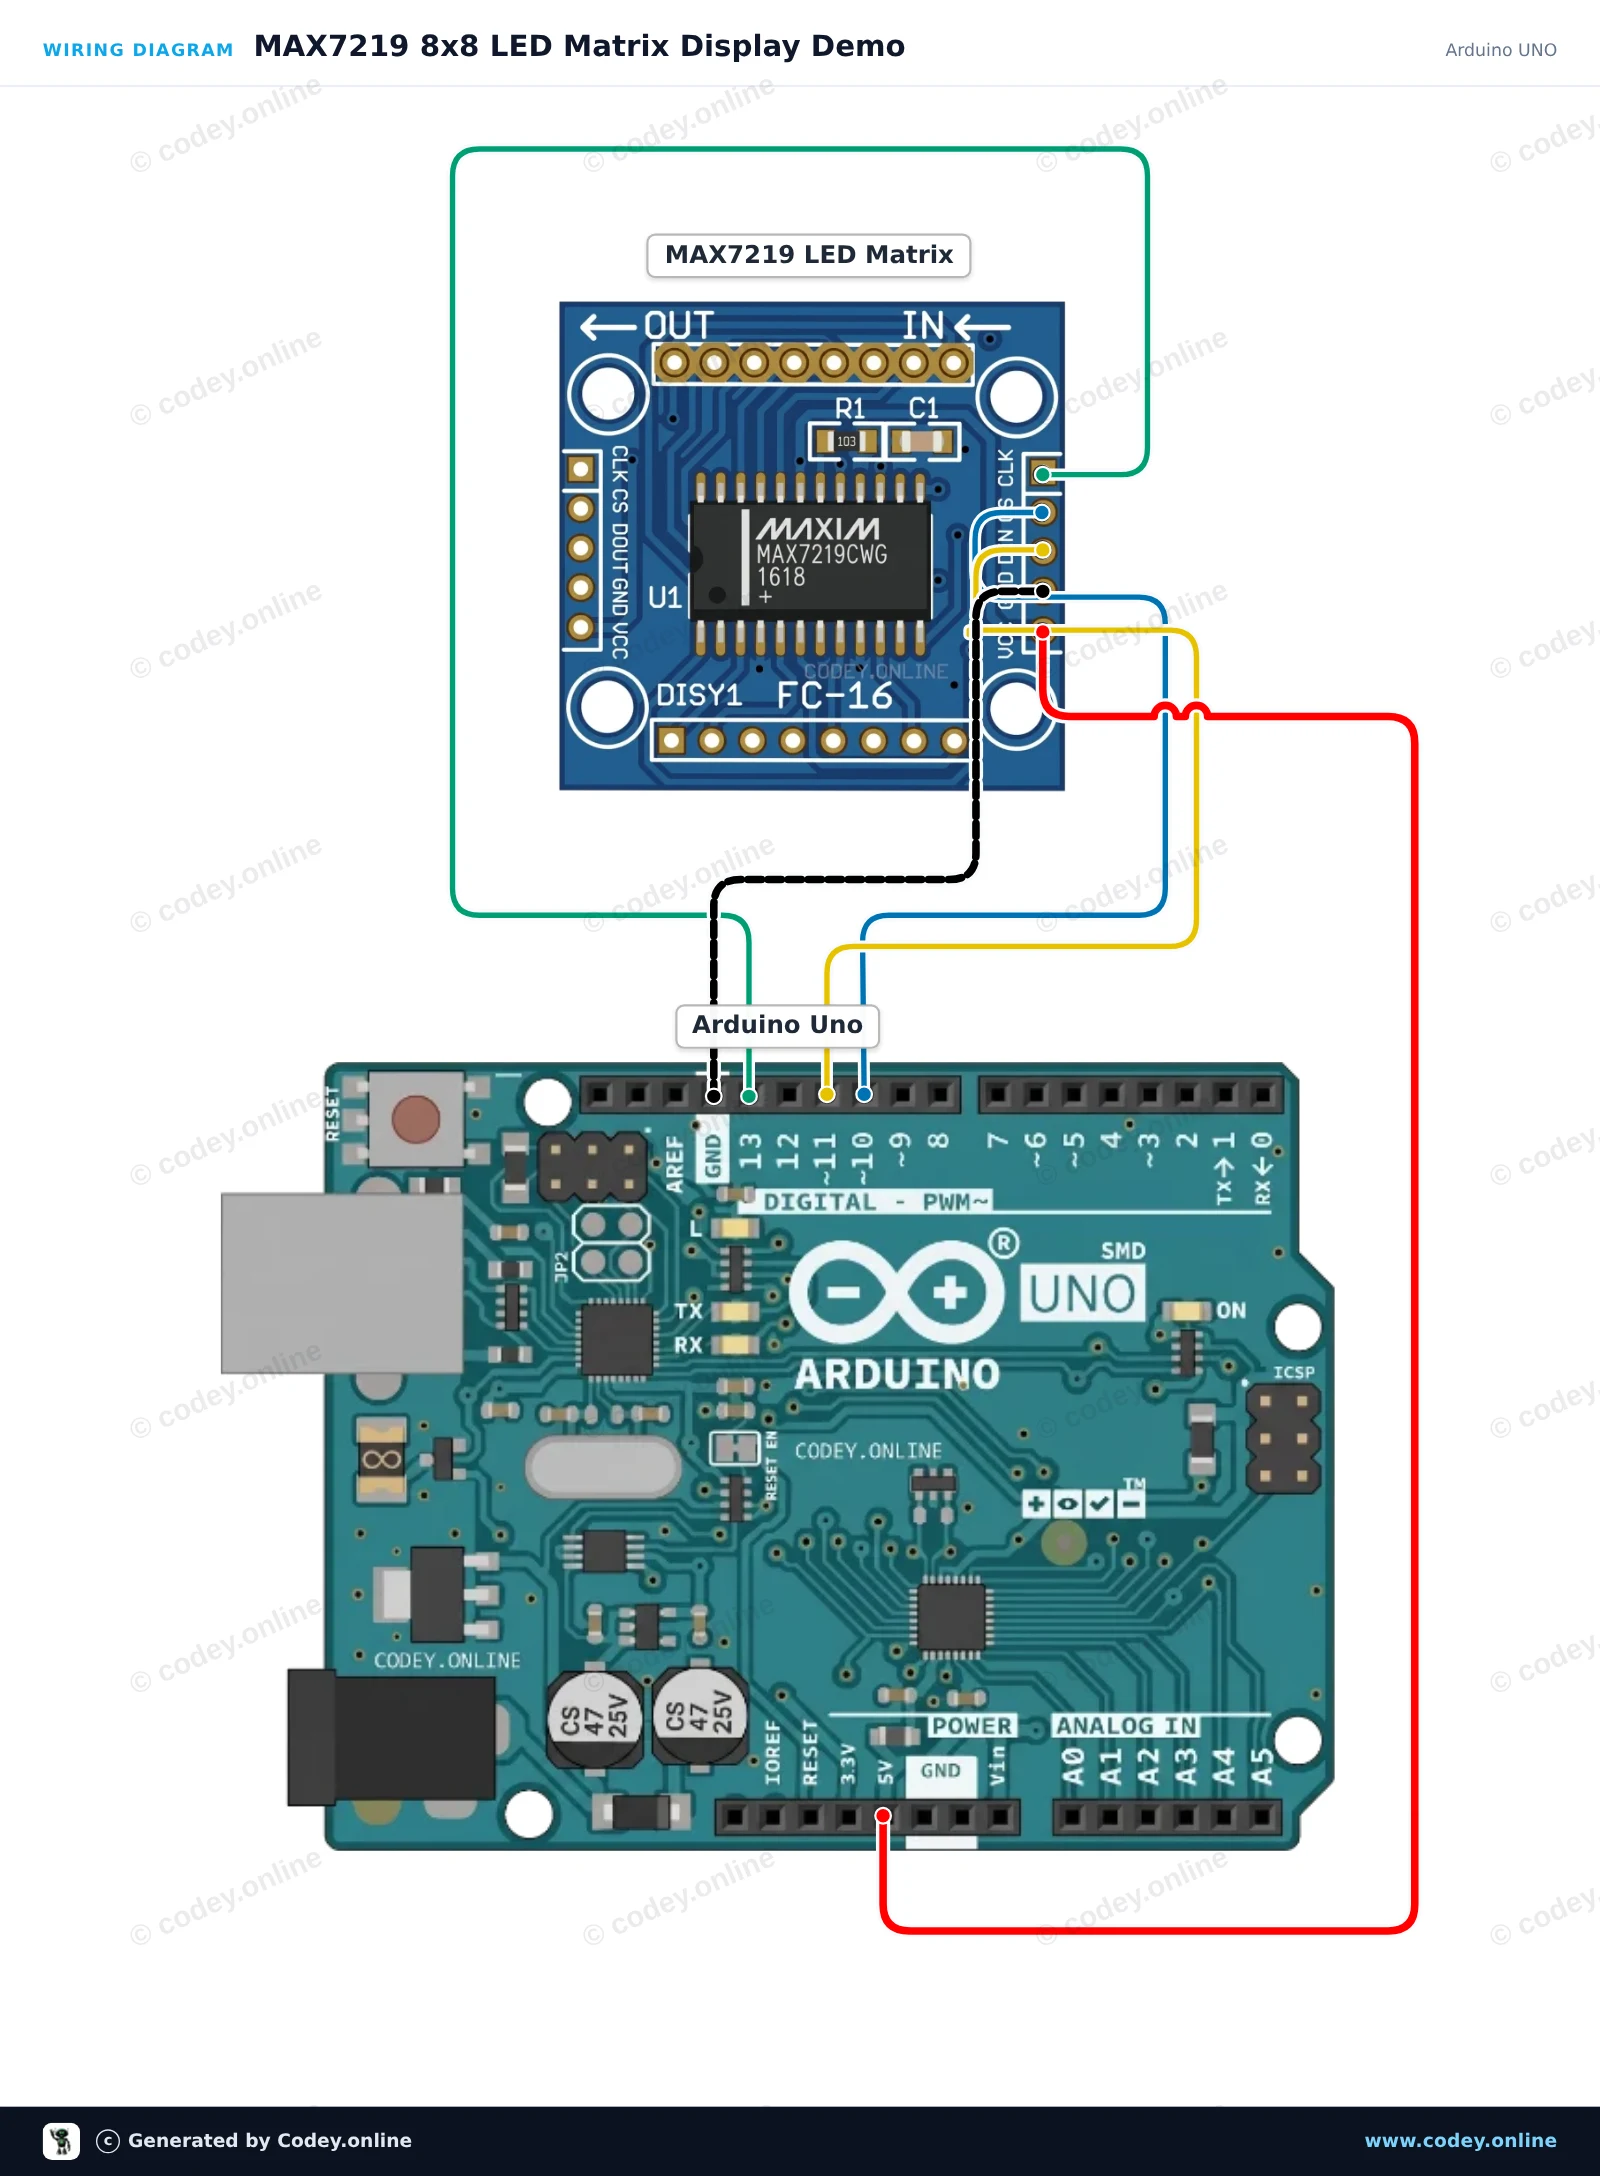
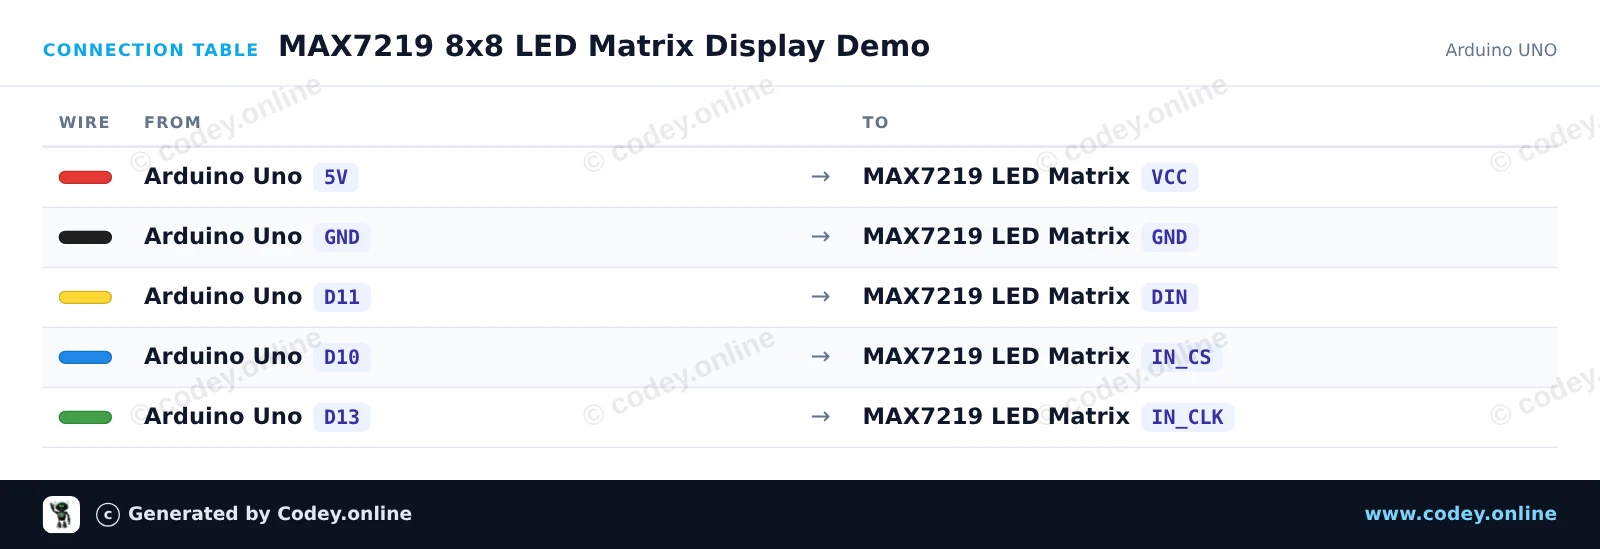
Tak podłączysz Moduł matrycy LED MAX7219 Niebieski do Arduino UNO lub ESP32, z przykładowym szkicem, który możesz od razu wgrać.
Ten projekt pokazuje, jak sterować matrycą LED 8x8 za pomocą układu sterującego MAX7219. Sketch wybudza matrycę, ustawia komfortowy poziom jasności i animuje odbijającą się kropkę po wszystkich wierszach i kolumnach.
/*
 * ==================================================================
 *  Generated by Codey.online  —  https://www.codey.online
 * ==================================================================
 *  Project   : MAX7219 8x8 LED Matrix Display Demo
 *  Board     : Arduino UNO (arduino:avr:uno)
 *  Parts     : LED Matrix Module MAX7219
 *  Libraries : LedControl 1.0.6
 *
 *  Codey Online is an AI-powered browser IDE for Arduino and ESP32.
 *  Describe your project and Codey writes the code, draws the wiring
 *  diagram and uploads it to your board, straight from the browser.
 *  This code is free to use, modify and share, without warranty.
 * ==================================================================
 */

#include <LedControl.h>

const int DIN_PIN = 11;
const int CLK_PIN = 13;
const int CS_PIN  = 10;

// Create LedControl instance: LedControl(DIN, CLK, CS, number_of_matrices)
LedControl lc = LedControl(DIN_PIN, CLK_PIN, CS_PIN, 1);

// 8x8 bitmap for a smile icon
const byte SMILE[8] = {
  B00111100,
  B01000010,
  B10100101,
  B10000001,
  B10100101,
  B10011001,
  B01000010,
  B00111100
};

// 8x8 bitmap for a heart icon
const byte HEART[8] = {
  B00000000,
  B01100110,
  B11111111,
  B11111111,
  B01111110,
  B00111100,
  B00011000,
  B00000000
};

void drawBitmap(const byte bitmap[]) {
  for (int row = 0; row < 8; row++) {
    lc.setRow(0, row, bitmap[row]);
  }
}

void setup() {
  Serial.begin(115200);

  // Wake up MAX7219 from power-saving mode
  lc.shutdown(0, false);
  // Set medium brightness (0 to 15)
  lc.setIntensity(0, 6);
  // Clear the display
  lc.clearDisplay(0);

  Serial.println(F("MAX7219 Matrix initialized!"));
}

void loop() {
  // Display Heart
  drawBitmap(HEART);
  delay(1500);

  // Display Smile
  drawBitmap(SMILE);
  delay(1500);

  // Pixel sweep effect
  lc.clearDisplay(0);
  for (int row = 0; row < 8; row++) {
    for (int col = 0; col < 8; col++) {
      lc.setLed(0, row, col, true);
      delay(25);
      lc.setLed(0, row, col, false);
    }
  }
}Wymagane biblioteki: LedControl 1.0.6
Wiring diagram and example code generated by Codey.online — https://www.codey.online
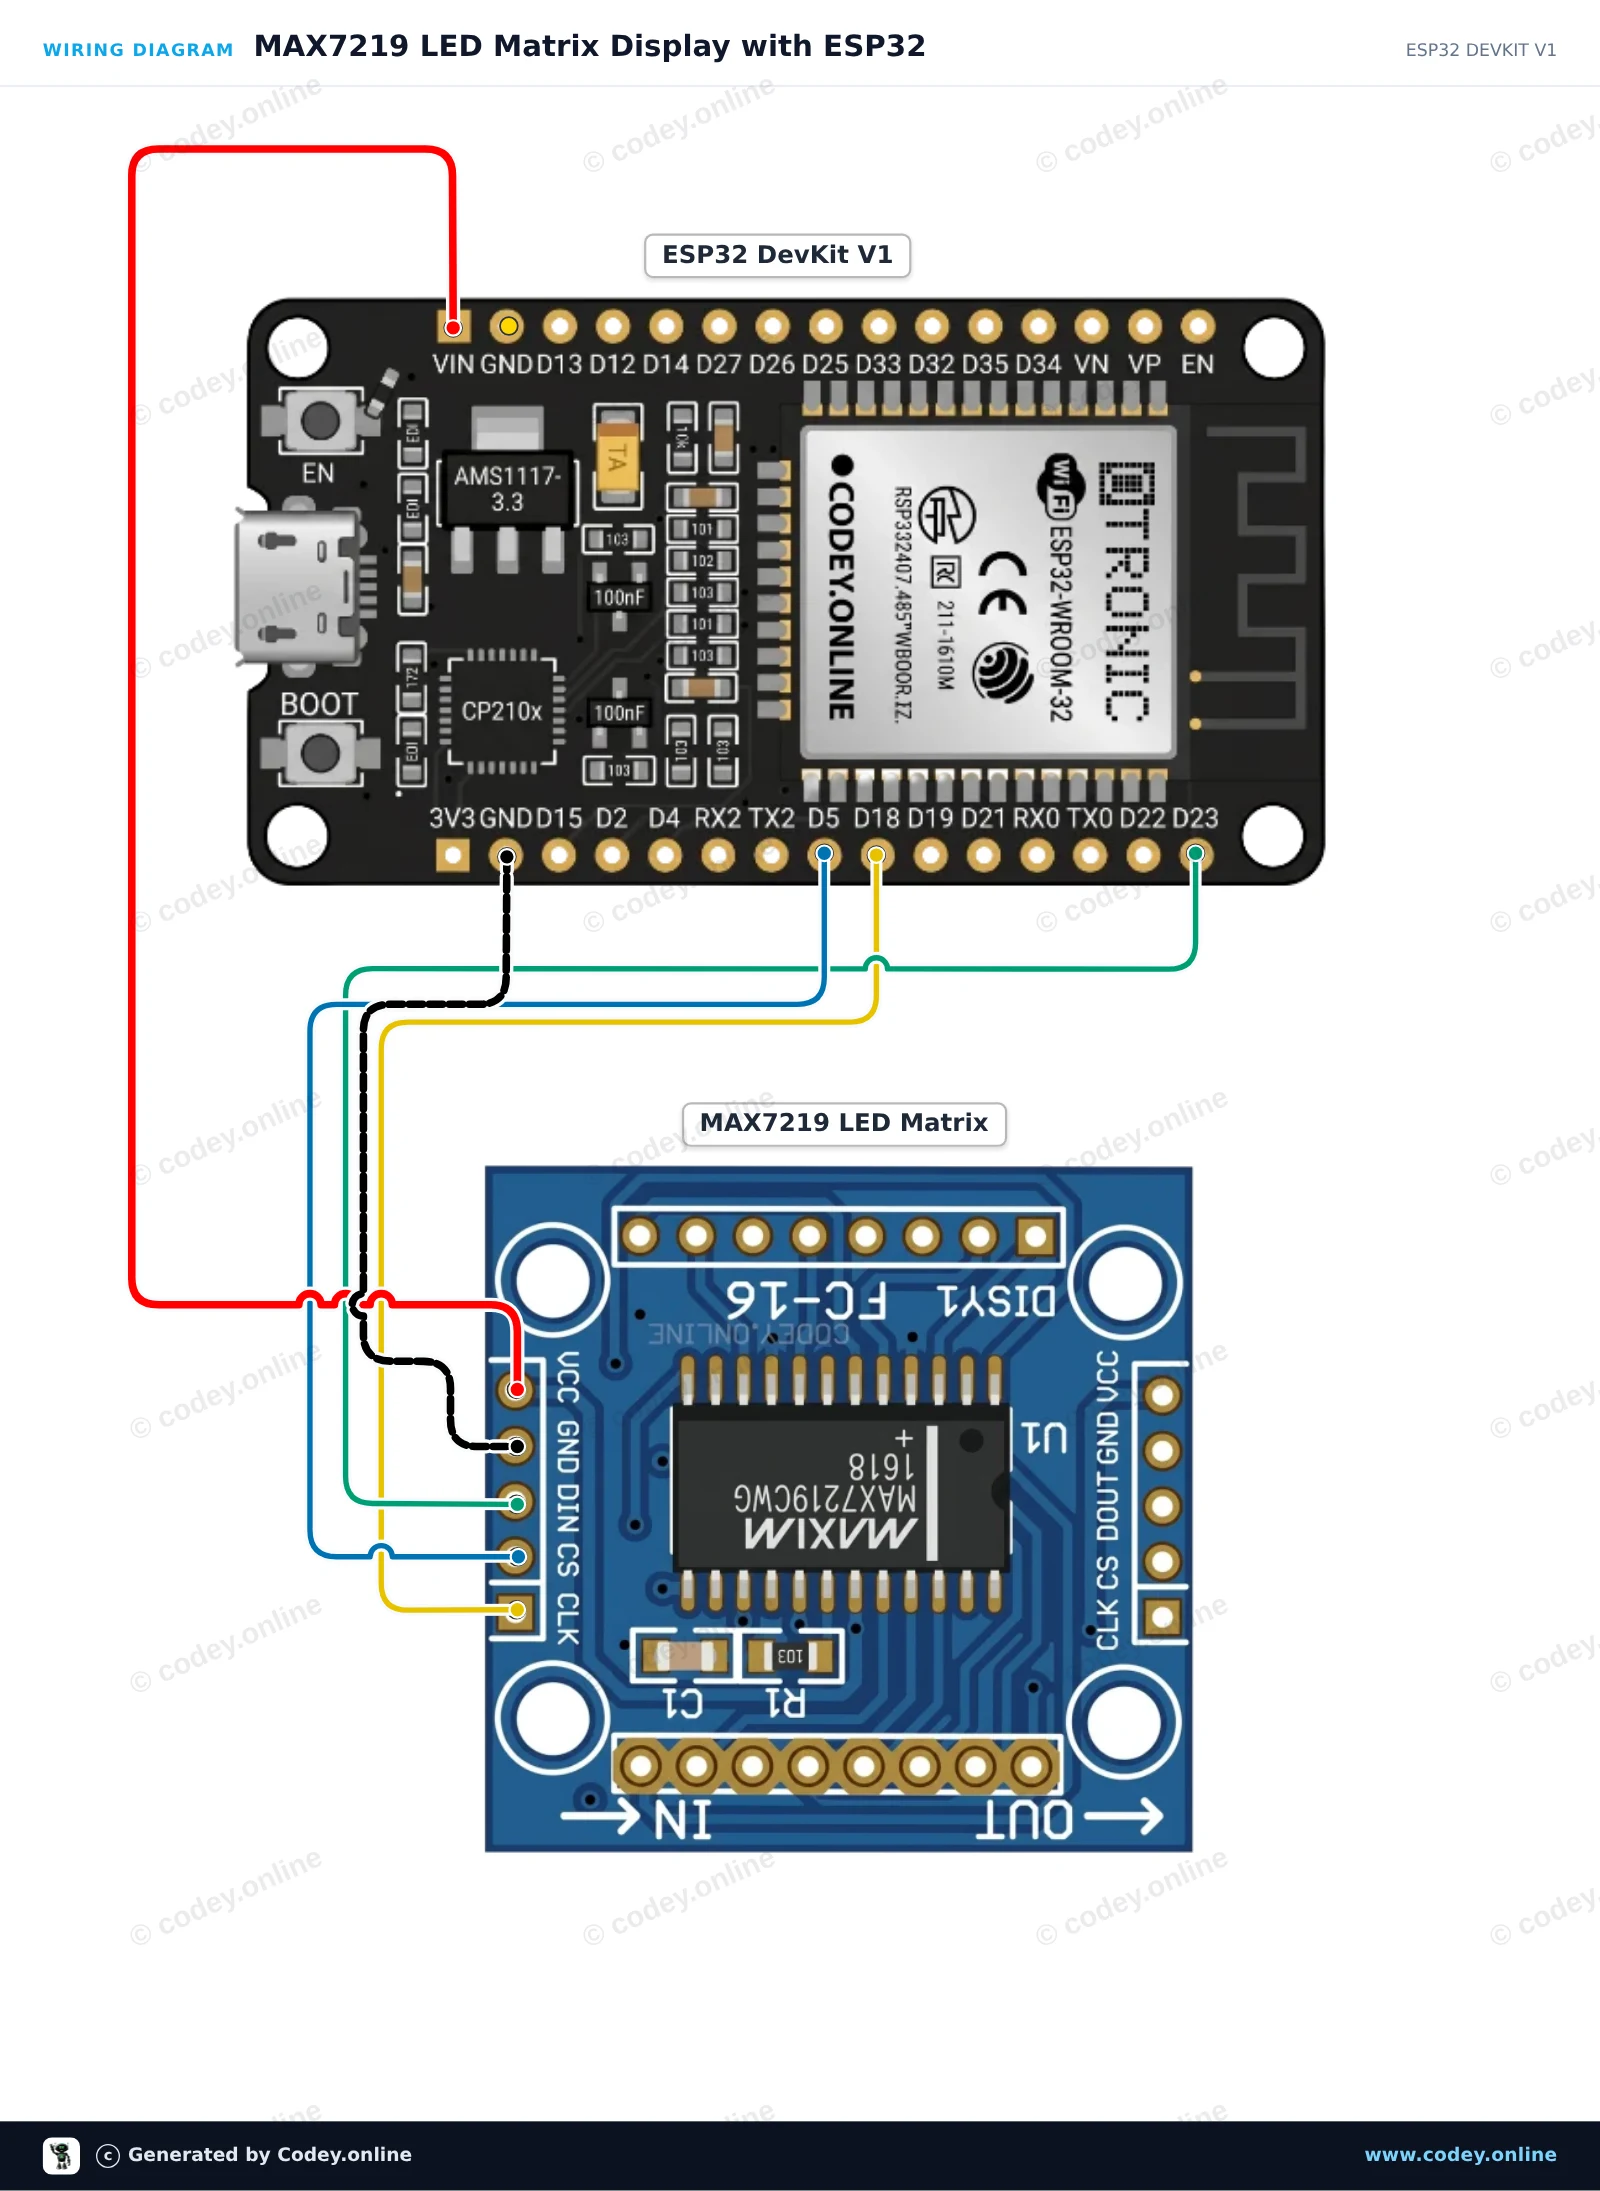
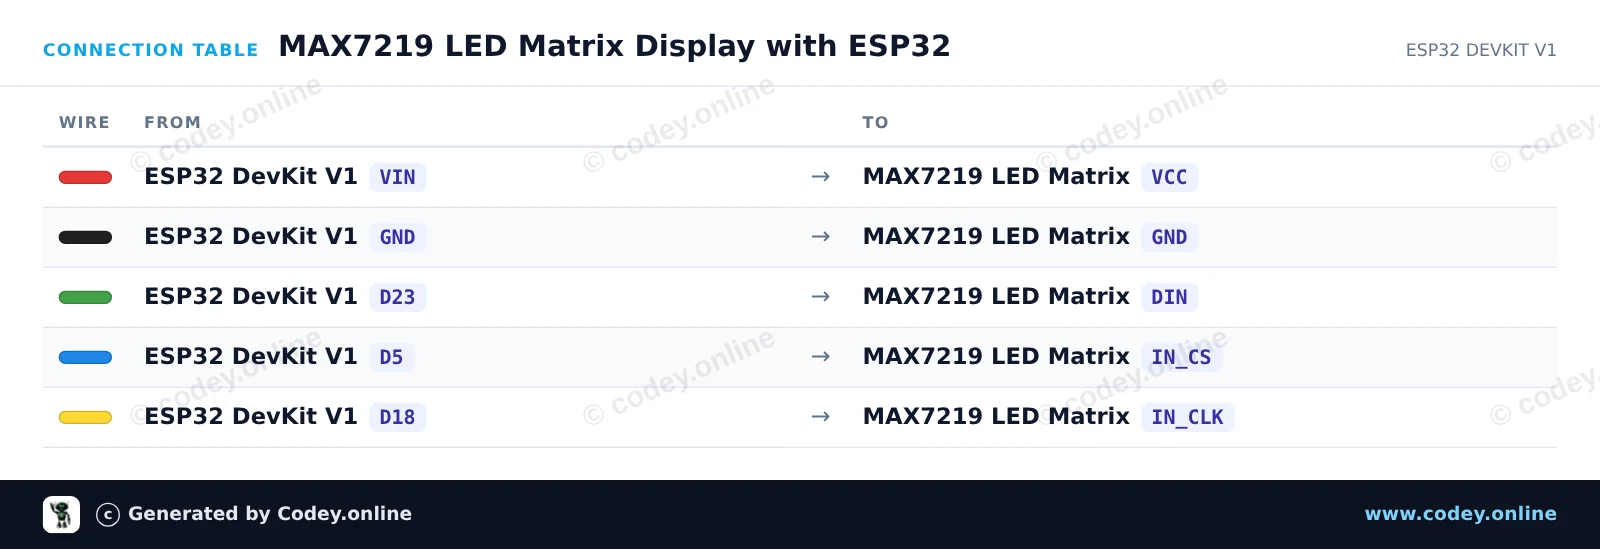
Ten projekt wyświetla własne wzory i animacje na module matrycy LED MAX7219 8x8 z użyciem sprzętowego SPI. ESP32 komunikuje się ze sterownikiem przez GPIO 23 (MOSI/DIN), GPIO 18 (SCK/CLK) i GPIO 5 (CS), zasilając wyświetlacz bezpośrednio z pinu 5V VIN.
/*
 * ==================================================================
 *  Generated by Codey.online  —  https://www.codey.online
 * ==================================================================
 *  Project   : MAX7219 LED Matrix Display with ESP32
 *  Board     : ESP32 DEVKIT V1 (esp32:esp32:esp32doit-devkit-v1)
 *  Parts     : LED Matrix Module MAX7219
 *  Libraries : none (built-in)
 *
 *  Codey Online is an AI-powered browser IDE for Arduino and ESP32.
 *  Describe your project and Codey writes the code, draws the wiring
 *  diagram and uploads it to your board, straight from the browser.
 *  This code is free to use, modify and share, without warranty.
 * ==================================================================
 */

#include <SPI.h>

const int CS_PIN = 5;

// MAX7219 register addresses
const byte REG_NOOP      = 0x00;
const byte REG_DECODE    = 0x09;
const byte REG_INTENSITY = 0x0A;
const byte REG_SCANLIMIT = 0x0B;
const byte REG_SHUTDOWN  = 0x0C;
const byte REG_DISPTEST  = 0x0F;

// Bitmaps for 8x8 graphics
const byte smile[8] = {
  0b00111100,
  0b01000010,
  0b10100101,
  0b10000001,
  0b10100101,
  0b10011001,
  0b01000010,
  0b00111100
};

const byte heart[8] = {
  0b00000000,
  0b01100110,
  0b11111111,
  0b11111111,
  0b11111111,
  0b01111110,
  0b00111100,
  0b00011000
};

void writeRegister(byte reg, byte data) {
  digitalWrite(CS_PIN, LOW);
  SPI.transfer(reg);
  SPI.transfer(data);
  digitalWrite(CS_PIN, HIGH);
}

void clearDisplay() {
  for (byte row = 1; row <= 8; row++) {
    writeRegister(row, 0x00);
  }
}

void drawBitmap(const byte bitmap[8]) {
  for (byte row = 0; row < 8; row++) {
    writeRegister(row + 1, bitmap[row]);
  }
}

void setup() {
  pinMode(CS_PIN, OUTPUT);
  digitalWrite(CS_PIN, HIGH);

  // Initialize hardware SPI (VSPI: SCK=18, MOSI=23)
  SPI.begin();

  // Configure MAX7219
  writeRegister(REG_DISPTEST, 0x00);  // Normal operation
  writeRegister(REG_SCANLIMIT, 0x07); // Scan all 8 digits/rows
  writeRegister(REG_DECODE, 0x00);    // No BCD decoding (raw matrix mode)
  writeRegister(REG_INTENSITY, 0x04); // Brightness (0x00 to 0x0F)
  writeRegister(REG_SHUTDOWN, 0x01);  // Wake up module

  clearDisplay();
}

void loop() {
  // Display smiley face
  drawBitmap(smile);
  delay(2000);

  // Display heart
  drawBitmap(heart);
  delay(2000);

  // Row sweep animation
  clearDisplay();
  for (byte i = 1; i <= 8; i++) {
    writeRegister(i, 0xFF);
    delay(100);
  }
  for (byte i = 1; i <= 8; i++) {
    writeRegister(i, 0x00);
    delay(100);
  }
}Wiring diagram and example code generated by Codey.online — https://www.codey.online





 English
  Nederlands
  Frans
Frans  Deutsch
  Italiano
  Español
  Suomi
Suomi  Dansk
Dansk  Ελληνικά
  Български
  Čeština
  Hrvatski
  Aileen