SKU: OT951-C101 Numer artykułu: XG648 EAN: 4502076751917

zobacz tutaj Schemat podłączenia i przykładowy kod >>>
Słowa kluczowe: relais 5v, 5v relais, relay 5v, 5v relay, relais laag, relais low, relay low, blauwe relais, relais blauw, relais 250v, relais 220v, relais 1 kanaal, relais 1-kanaals, relay 1 channel
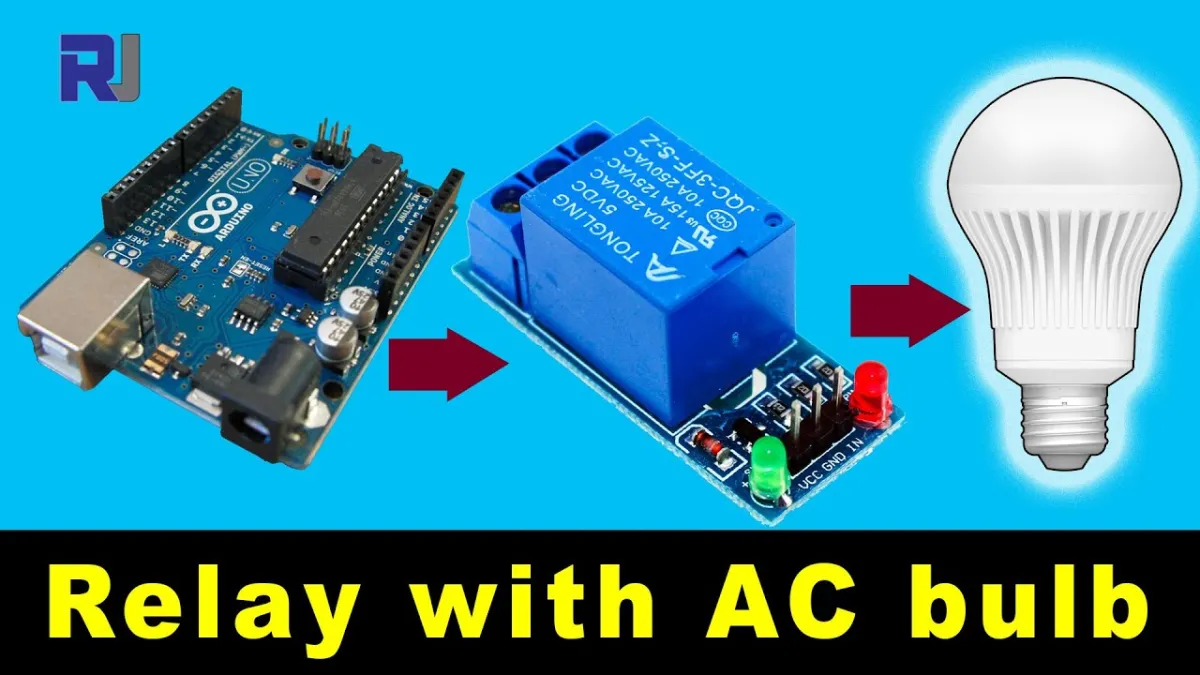
Odtworzenie spowoduje załadowanie filmu z YouTube.
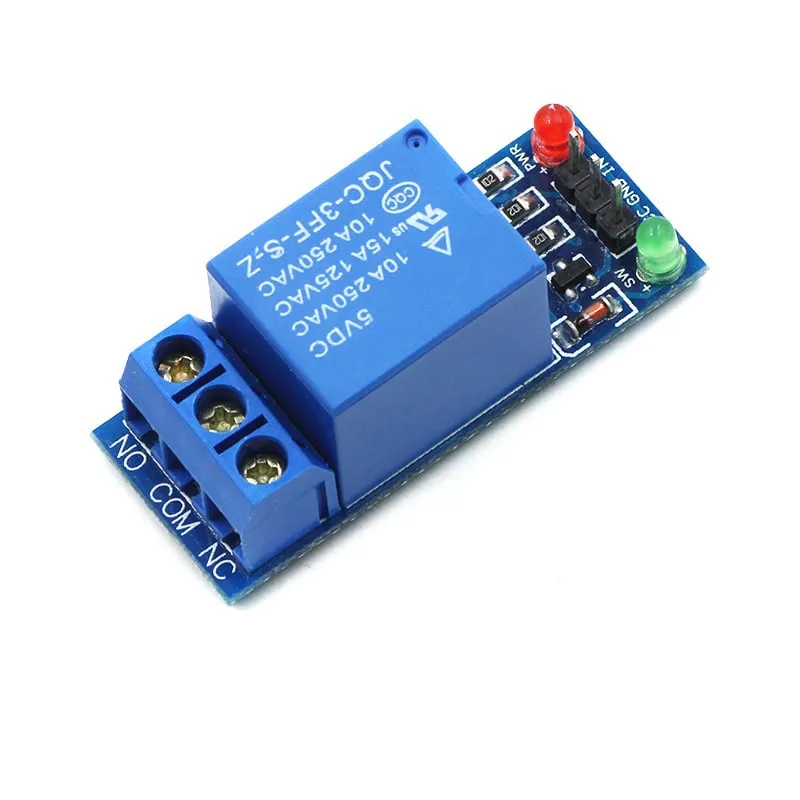
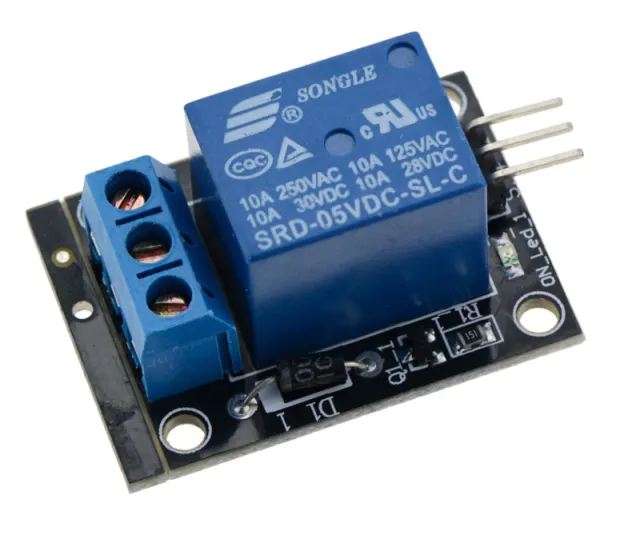
Tak podłączysz Moduł przekaźnika 5v Low do Arduino UNO lub ESP32, z przykładowym szkicem, który możesz od razu wgrać.
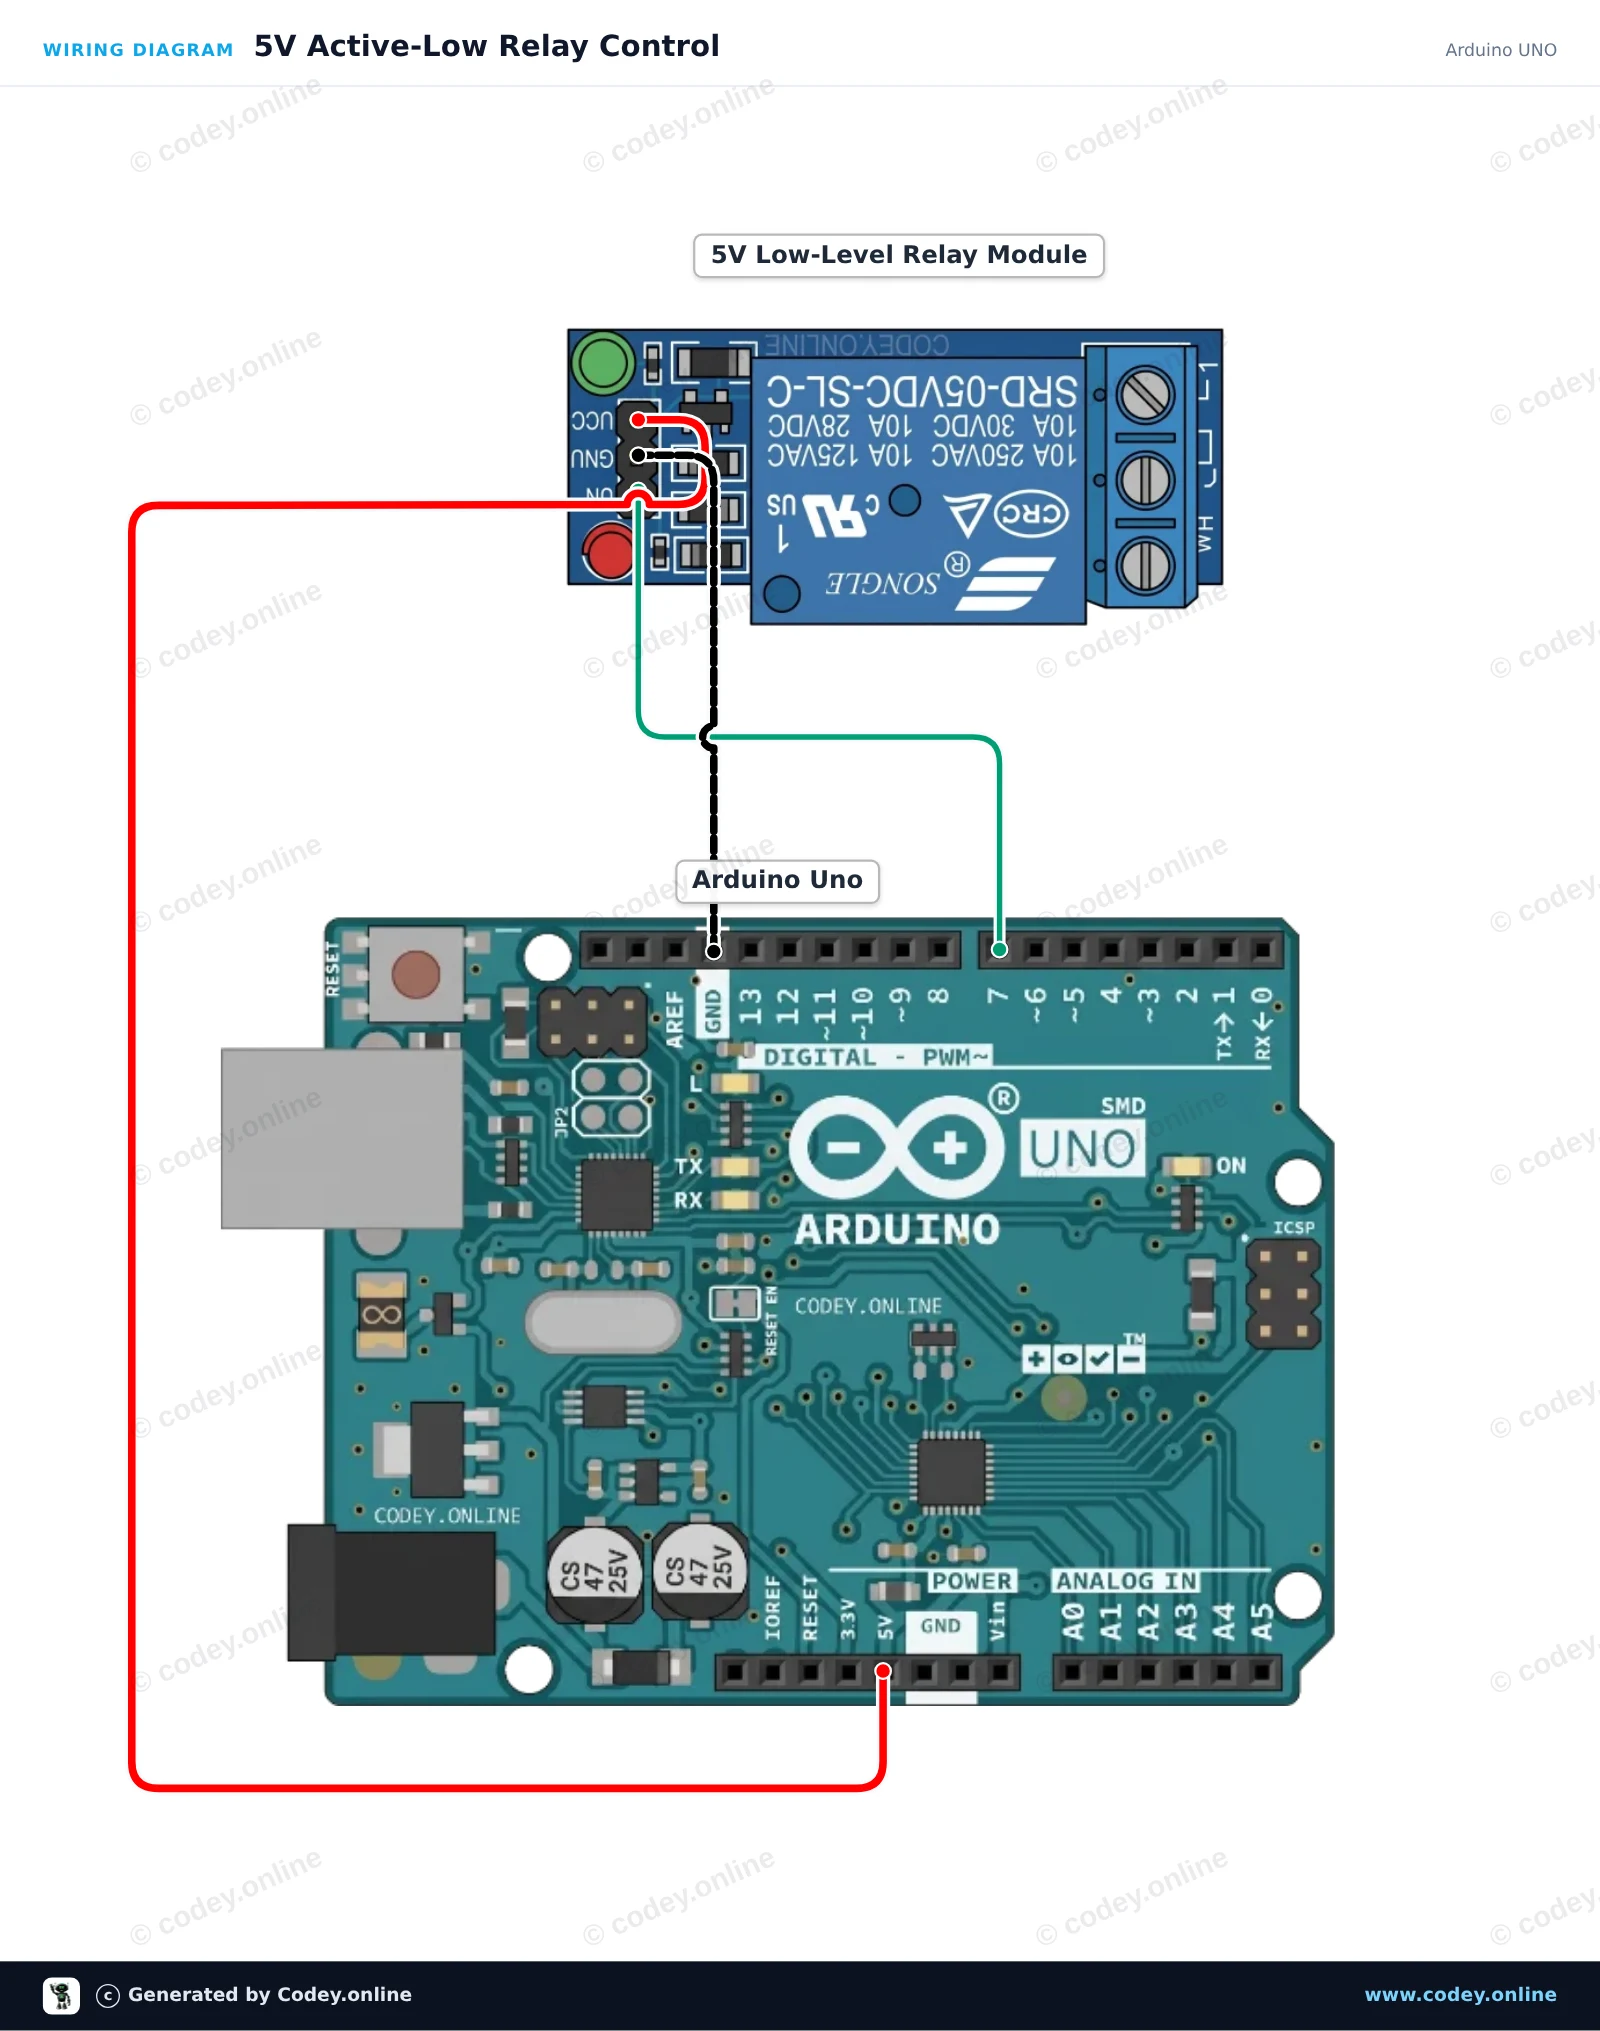
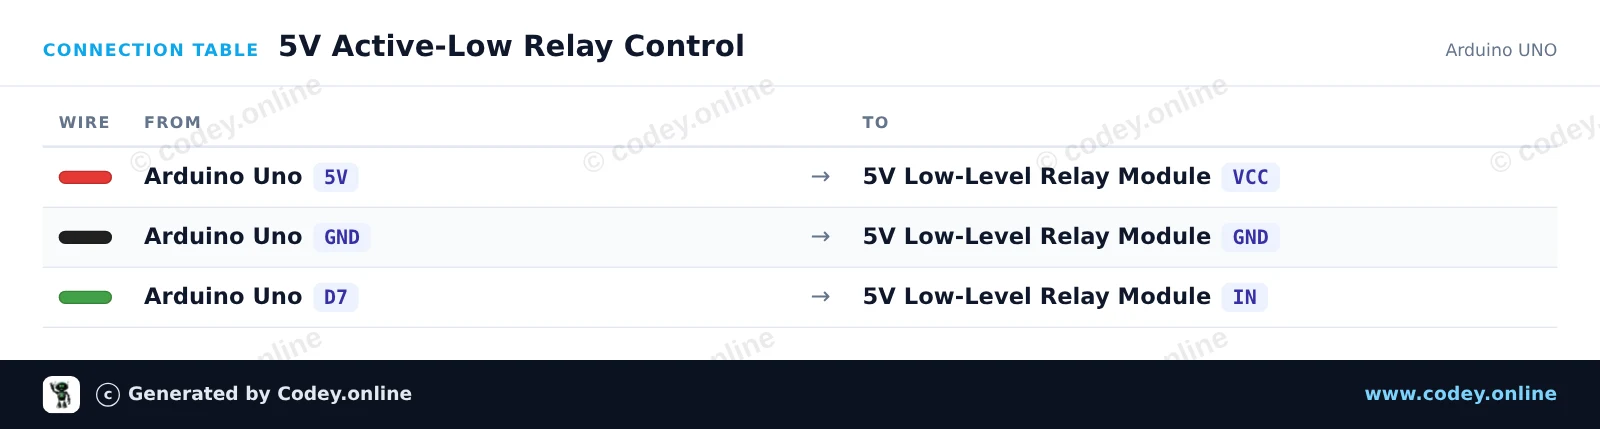
Ten projekt pokazuje, jak sterować modułem przekaźnika active-low 5V za pomocą Arduino Uno. Szkic przełącza przekaźnik ON i OFF co dwie sekundy, jednocześnie wypisując aktualny stan w Serial Monitor. Ponieważ jest to moduł active-low, ustawienie pinu sterującego na LOW aktywuje przekaźnik, a ustawienie go na HIGH go dezaktywuje.
/*
 * ==================================================================
 *  Generated by Codey.online  —  https://www.codey.online
 * ==================================================================
 *  Project   : 5V Active-Low Relay Control
 *  Board     : Arduino UNO (arduino:avr:uno)
 *  Parts     : Relais Module 5v Low
 *  Libraries : none (built-in)
 *
 *  Codey Online is an AI-powered browser IDE for Arduino and ESP32.
 *  Describe your project and Codey writes the code, draws the wiring
 *  diagram and uploads it to your board, straight from the browser.
 *  This code is free to use, modify and share, without warranty.
 * ==================================================================
 */

// Pin configuration
const int relayPin = 7;

void setup() {
  // Set the relay pin as output
  pinMode(relayPin, OUTPUT);

  // Active-low relay: default to OFF (HIGH state)
  digitalWrite(relayPin, HIGH);

  Serial.begin(115200);
  while (!Serial) {
    ; // Wait for serial port to connect
  }

  Serial.println(F("5V Relay Module Demo Started"));
  Serial.println(F("Relay will toggle every 2 seconds."));
}

void loop() {
  // Turn relay ON (active LOW)
  Serial.println(F("Relay: ON"));
  digitalWrite(relayPin, LOW);
  delay(2000);

  // Turn relay OFF (HIGH)
  Serial.println(F("Relay: OFF"));
  digitalWrite(relayPin, HIGH);
  delay(2000);
}Wiring diagram and example code generated by Codey.online — https://www.codey.online
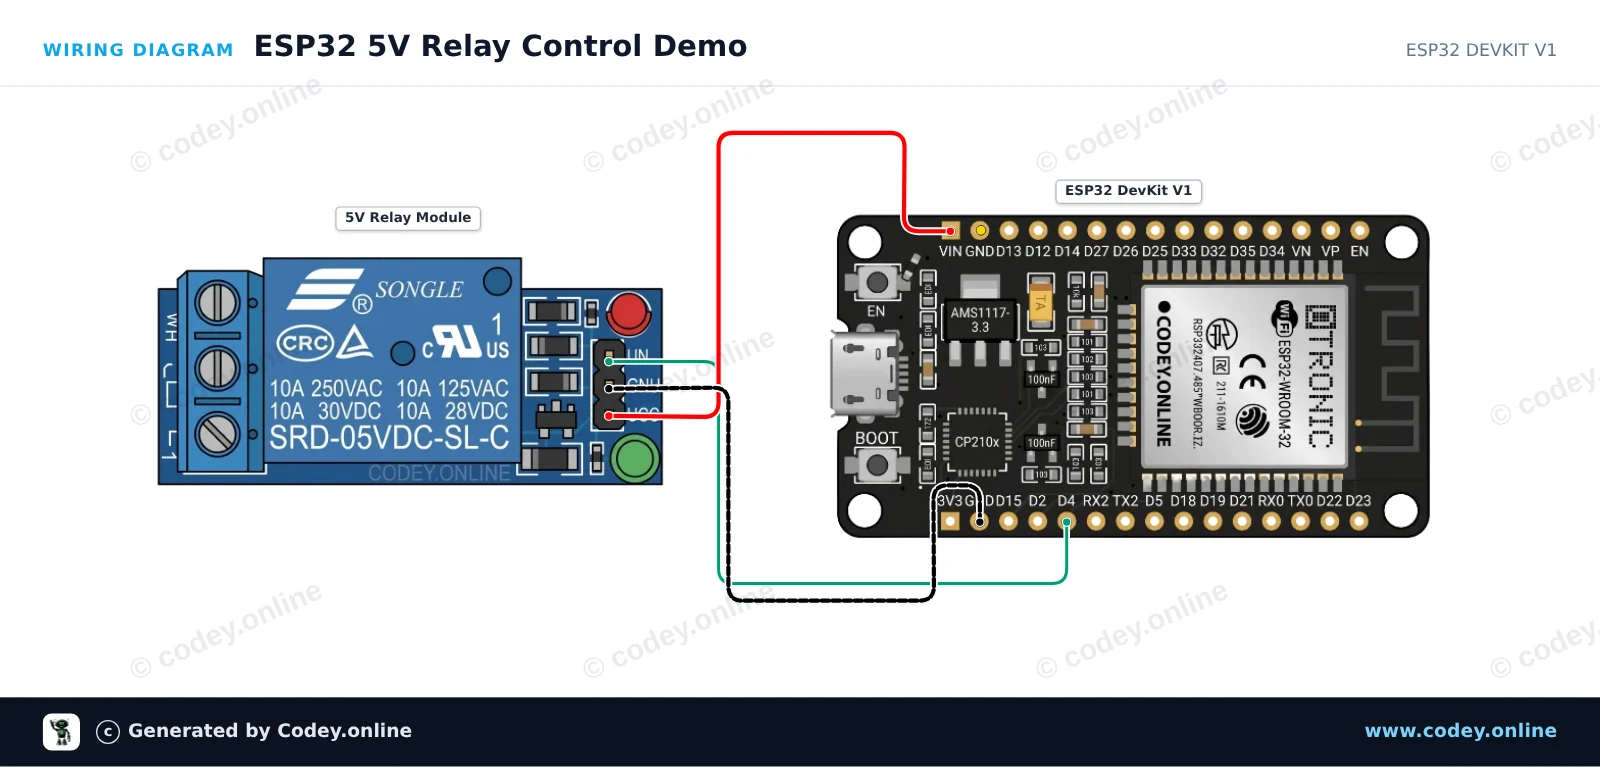
Ten przykład pokazuje, jak sterować modułem przekaźnika 5V active-low za pomocą ESP32. Cewka przekaźnika jest zasilana z pinu VIN (5V z USB), a GPIO 4 przełącza pin sterujący. Ustawienie pinu sterującego na LOW załącza przekaźnik, a ustawienie go na HIGH wyłącza go.
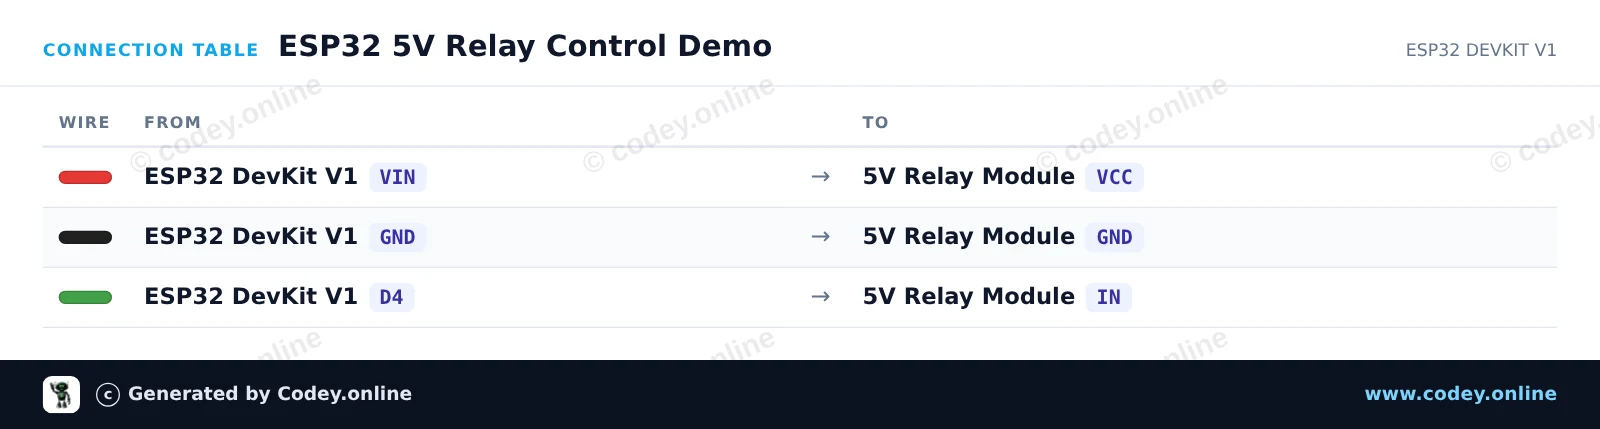
/*
 * ==================================================================
 *  Generated by Codey.online  —  https://www.codey.online
 * ==================================================================
 *  Project   : ESP32 5V Relay Control Demo
 *  Board     : ESP32 DEVKIT V1 (esp32:esp32:esp32doit-devkit-v1)
 *  Parts     : Relais Module 5v Low
 *  Libraries : none (built-in)
 *
 *  Codey Online is an AI-powered browser IDE for Arduino and ESP32.
 *  Describe your project and Codey writes the code, draws the wiring
 *  diagram and uploads it to your board, straight from the browser.
 *  This code is free to use, modify and share, without warranty.
 * ==================================================================
 */

// Pin connected to relay IN
const int RELAY_PIN = 4;

void setup() {
  Serial.begin(115200);

  // Configure relay pin as output and start with relay OFF (HIGH = inactive for active-low module)
  pinMode(RELAY_PIN, OUTPUT);
  digitalWrite(RELAY_PIN, HIGH);

  Serial.println("ESP32 Relay Module Demo Initialized");
}

void loop() {
  // Turn relay ON (Active-low: LOW energizes coil)
  Serial.println("Relay: ON");
  digitalWrite(RELAY_PIN, LOW);
  delay(2000);

  // Turn relay OFF (Active-low: HIGH de-energizes coil)
  Serial.println("Relay: OFF");
  digitalWrite(RELAY_PIN, HIGH);
  delay(2000);
}Wiring diagram and example code generated by Codey.online — https://www.codey.online






 English
  Nederlands
  Frans
Frans  Deutsch
  Italiano
  Español
  Suomi
Suomi  Dansk
Dansk  Ελληνικά
  Български
  Čeština
  Hrvatski
  Aileen