SKU: OT822-C66 Numer artykułu: AA413 EAN: 2268898153460

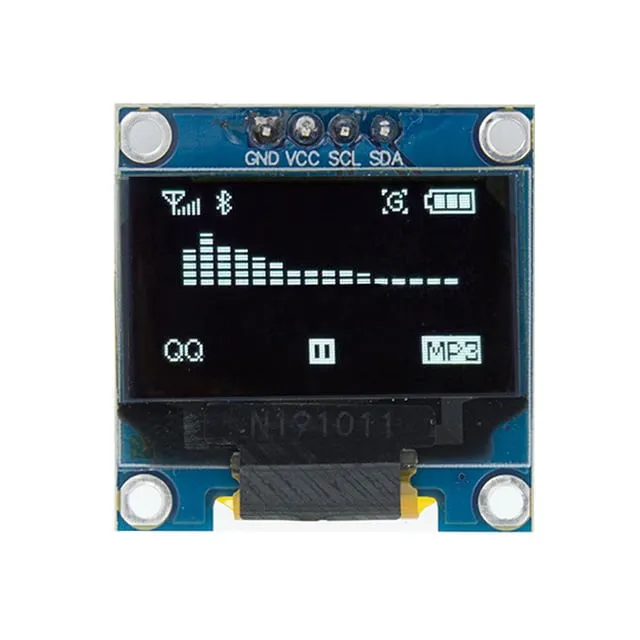
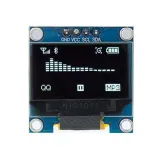
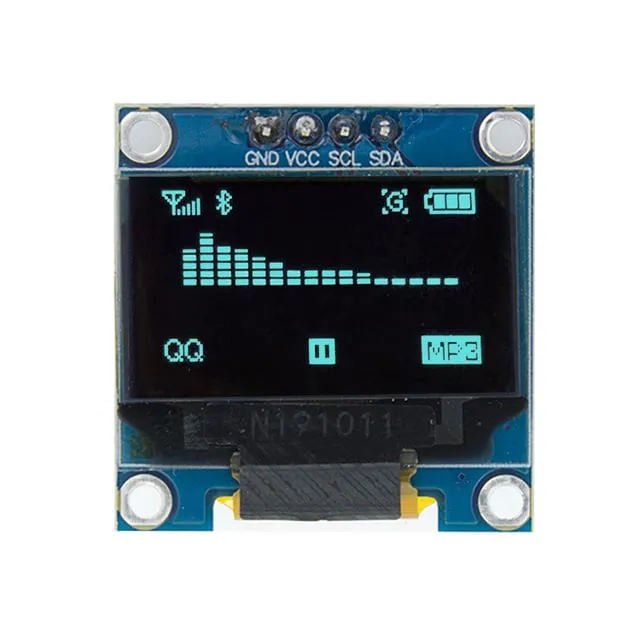
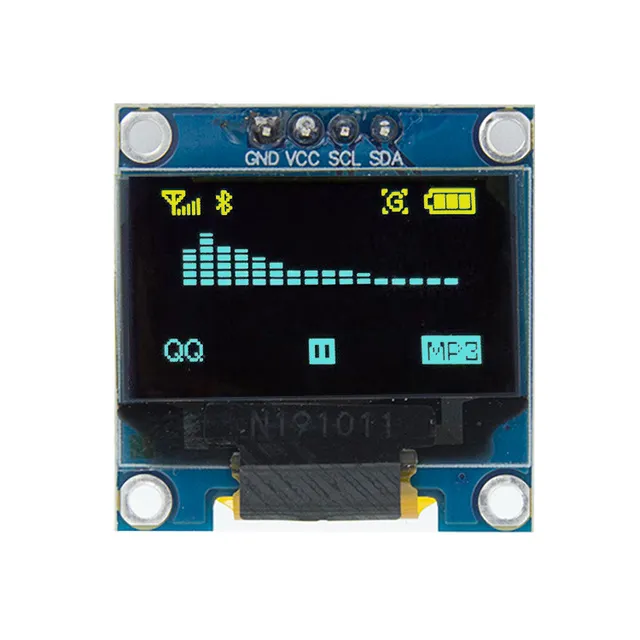
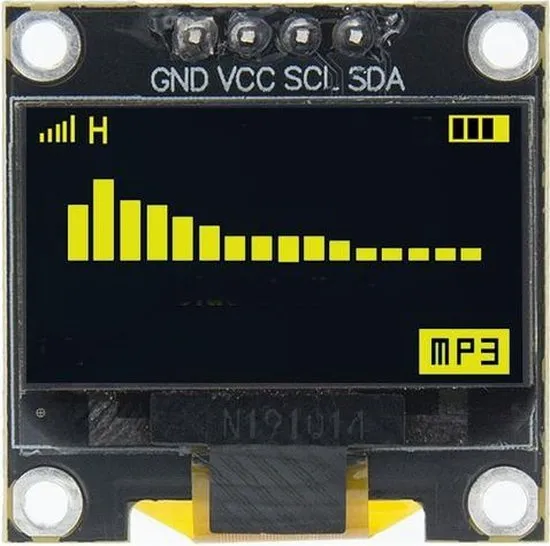
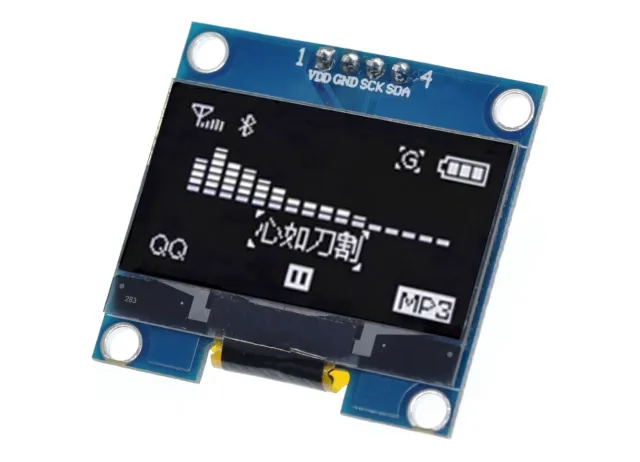
Mini wyświetlacz OLED 0,96 inch. Ostry obraz o rozdzielczości 128x64 pikseli.
Działa z zasilaniem 3v-5v. Idealny do projektów Arduino lub ESP32 / ESP8266.
Wymiary tej płytki to zaledwie 26,1 x 26,1 x 3,2mm.
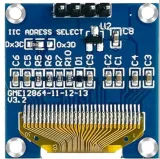
Można wybrać 2 adresy i2c poprzez zmianę rezystora z tyłu.
Dostępne adresy to: 0x3C (default) i x3D
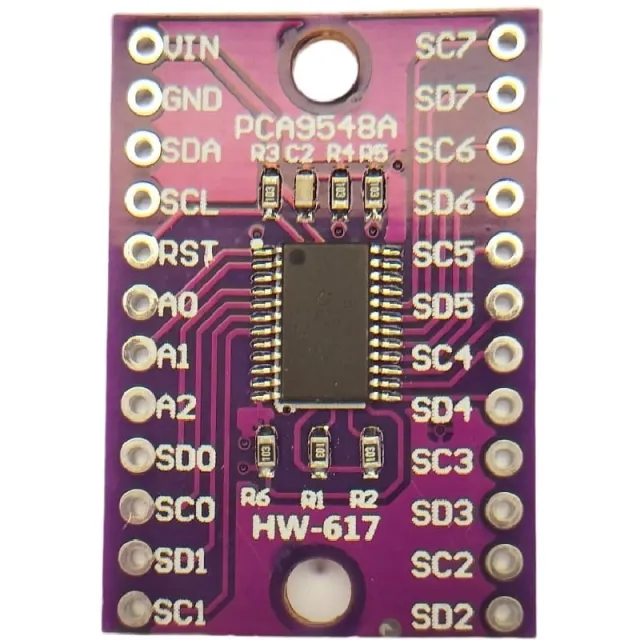
Jeśli chcesz sterować wieloma wyświetlaczami OLED lub nie chcesz lutować SMD, możesz za pomocą i2c mutliplexer sterować także do 8x wyświetlaczy i2C z tym samym adresem.
zobacz tutaj schemat połączeń i przykładowy kod >>>
Wymiary
Długość: 2,61cm
Szerokość: 2,61cm
Wysokość: 0,32cm
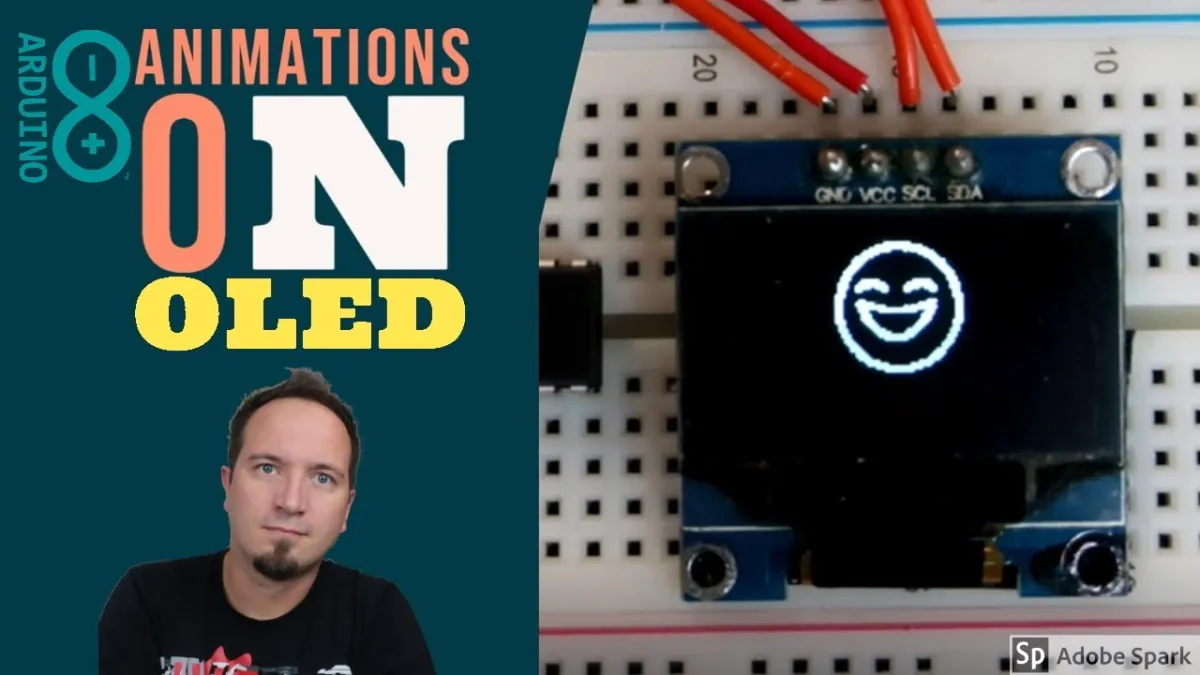
Odtworzenie spowoduje załadowanie filmu z YouTube.
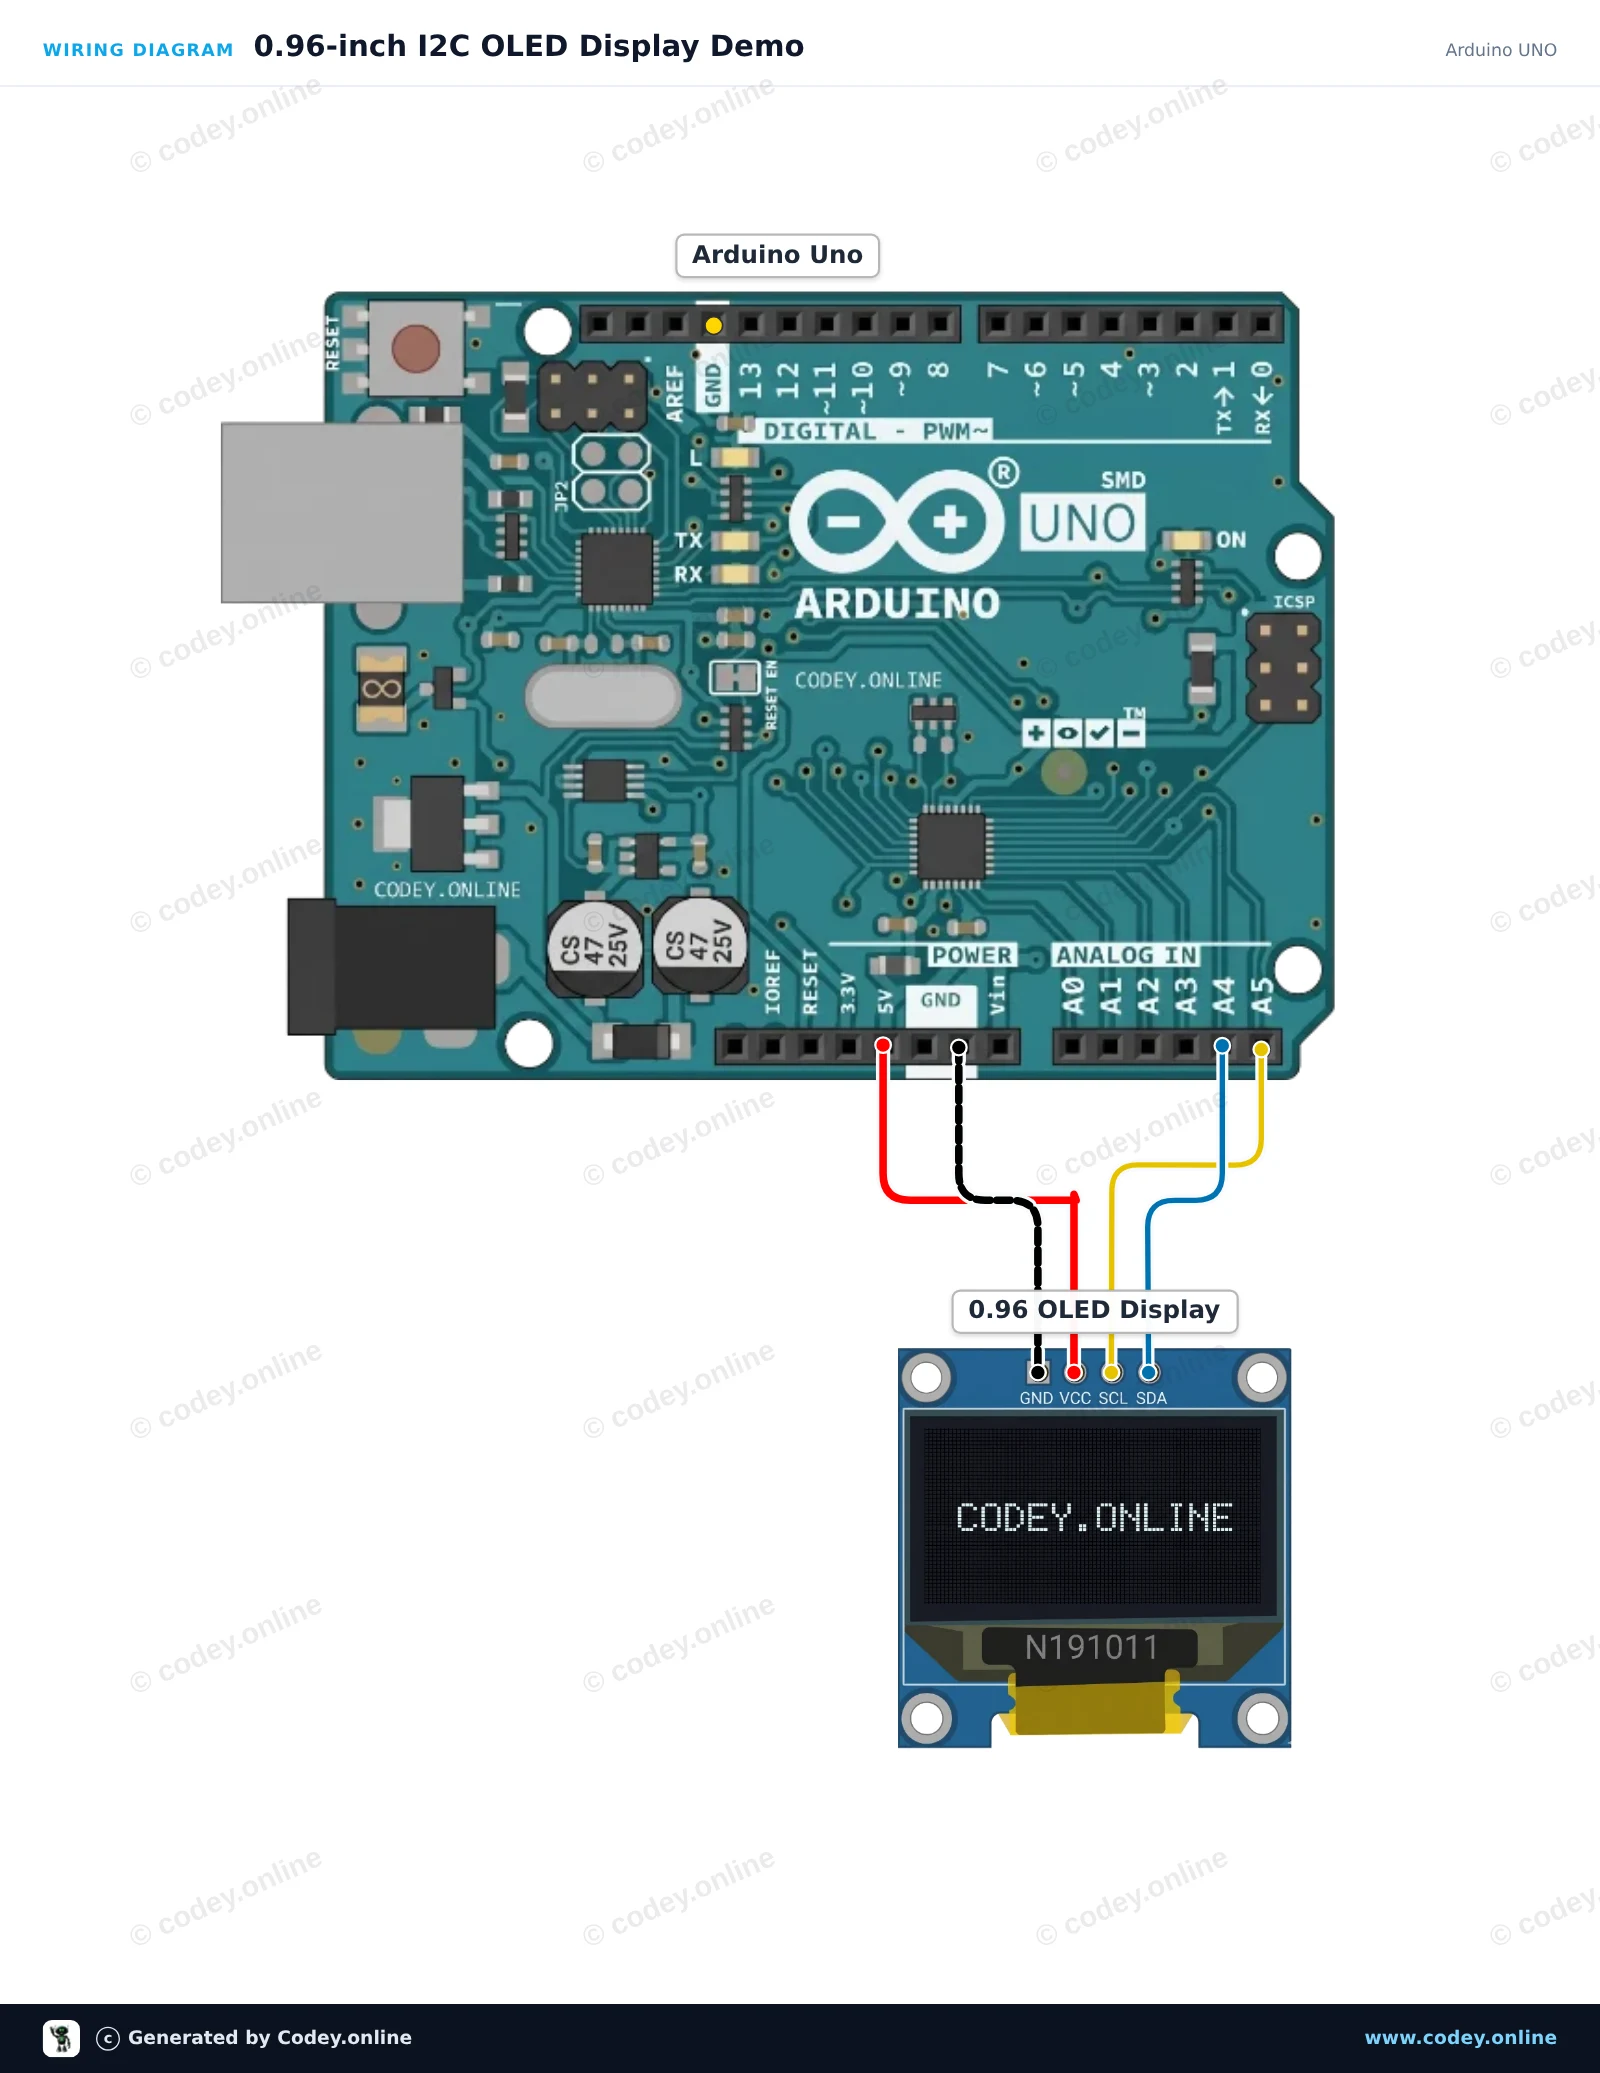
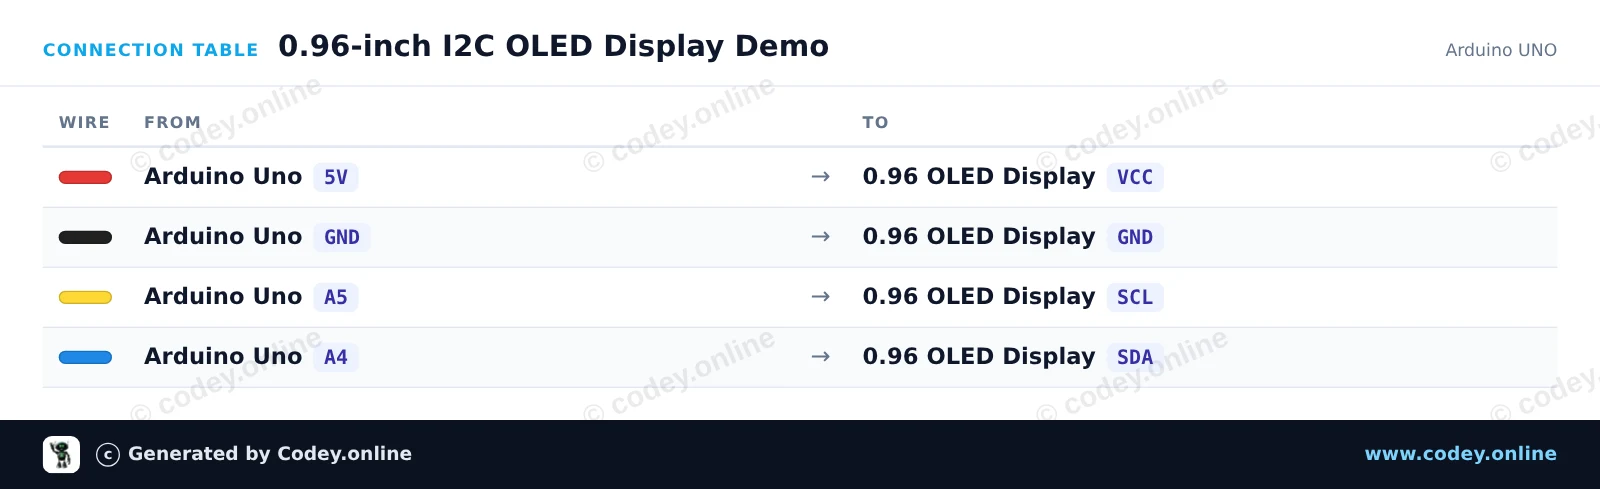
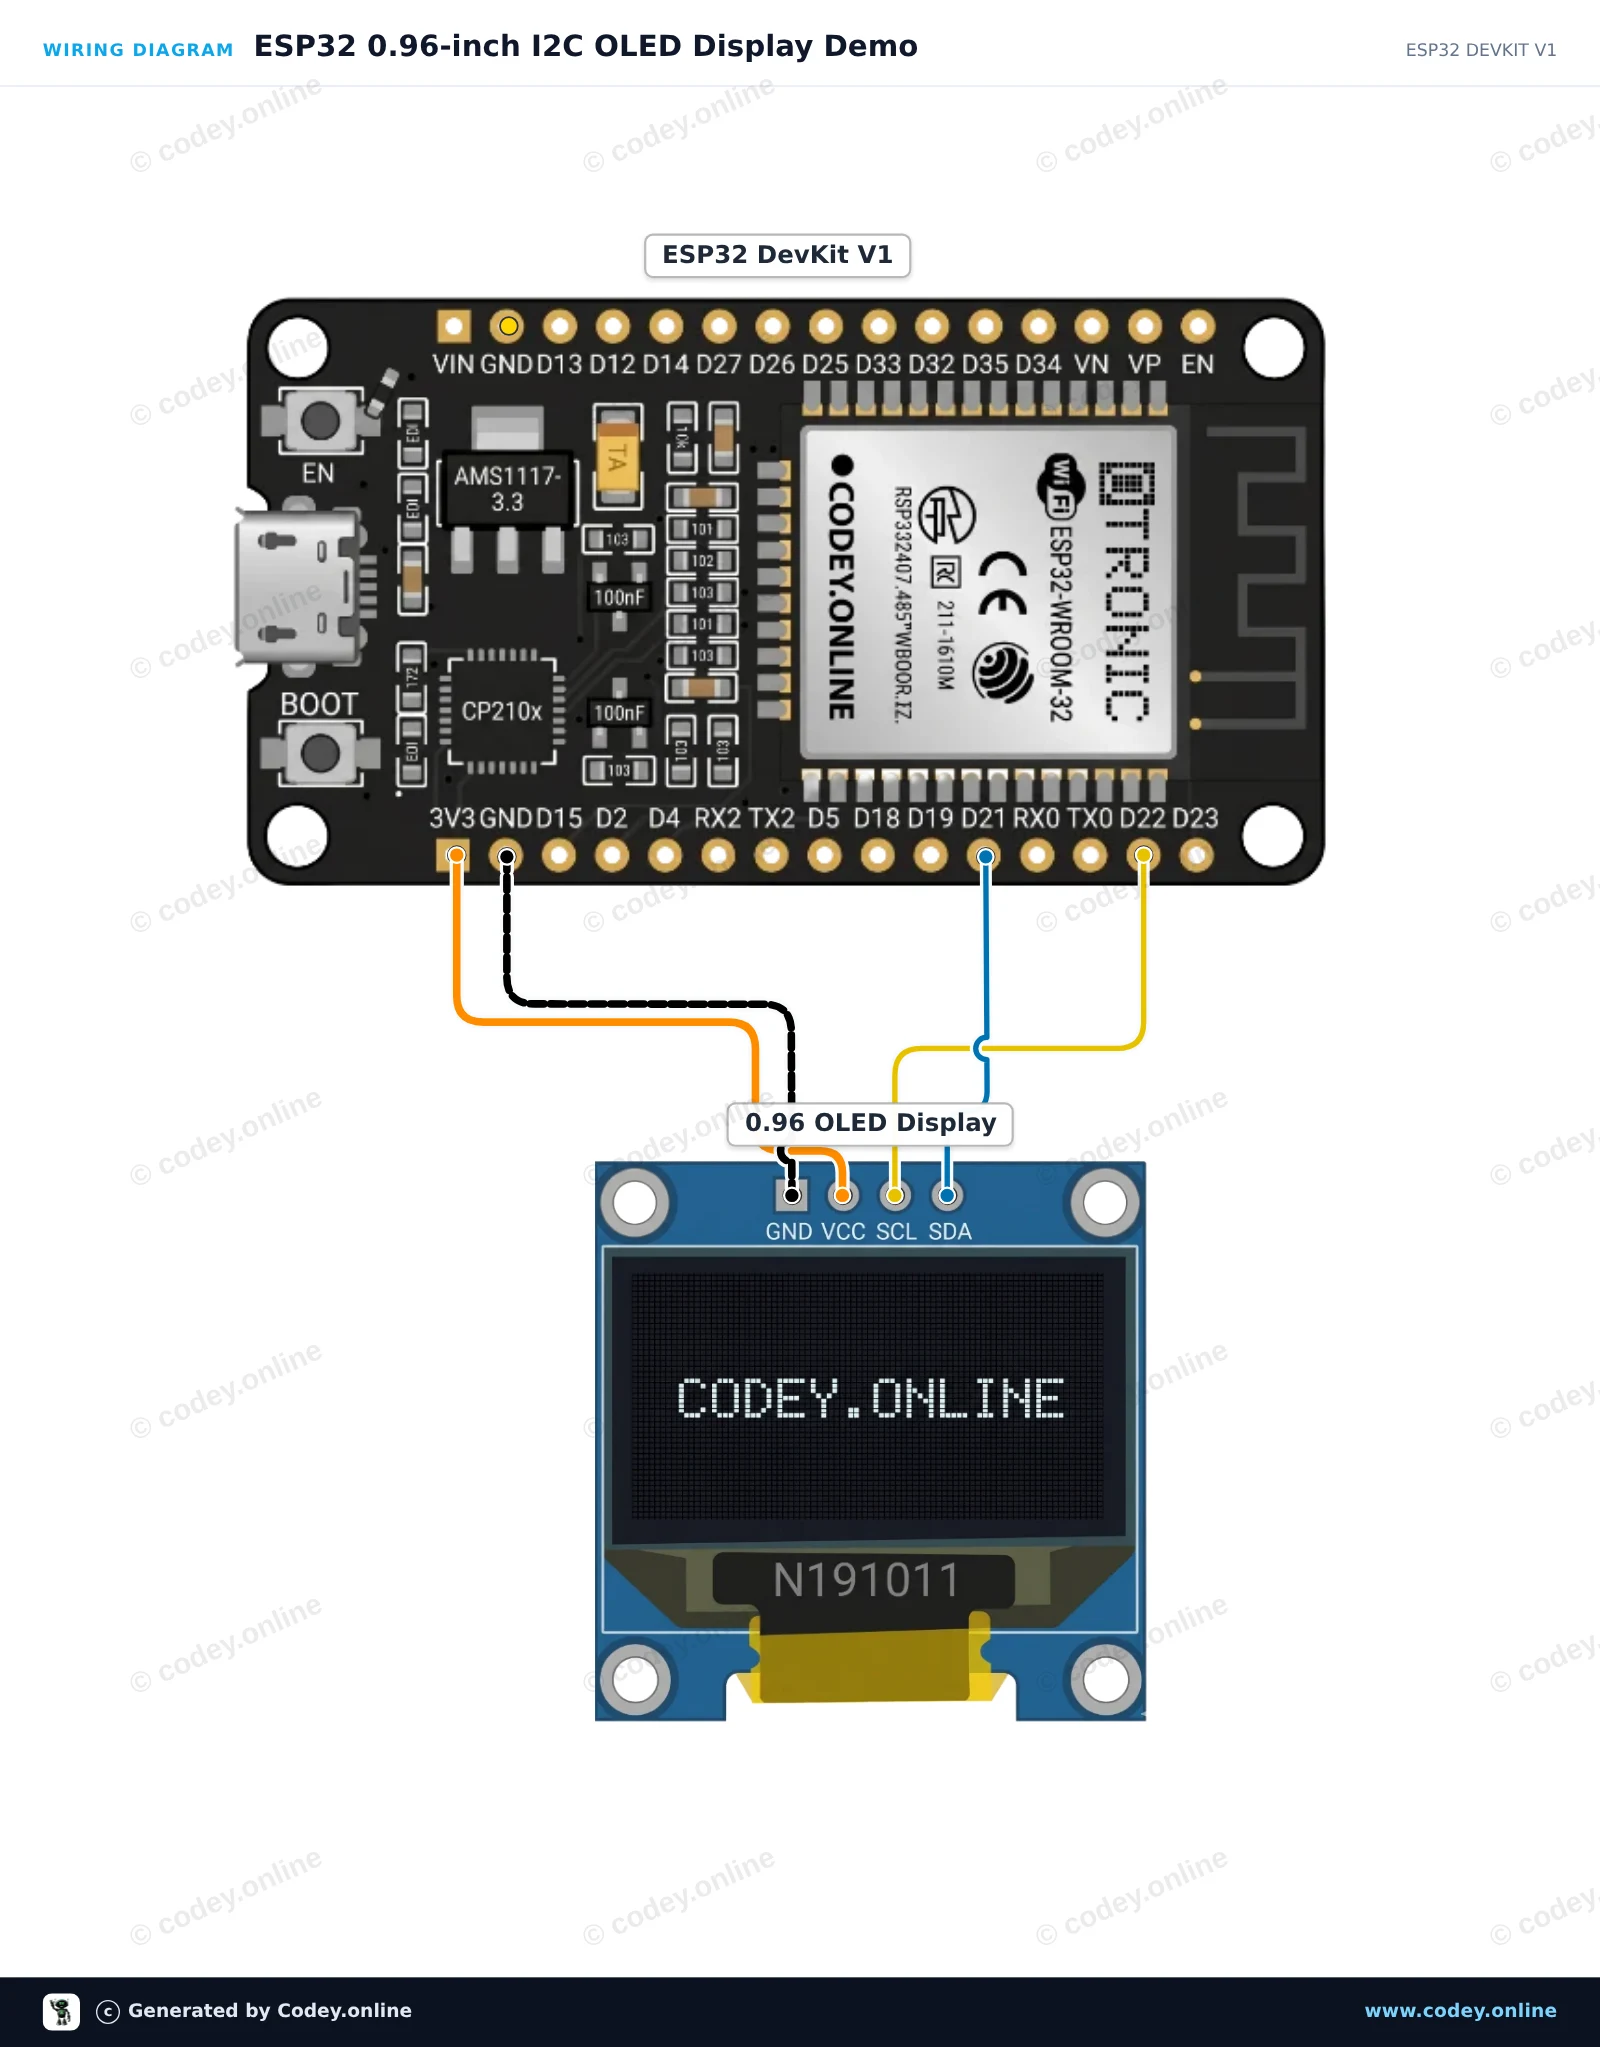
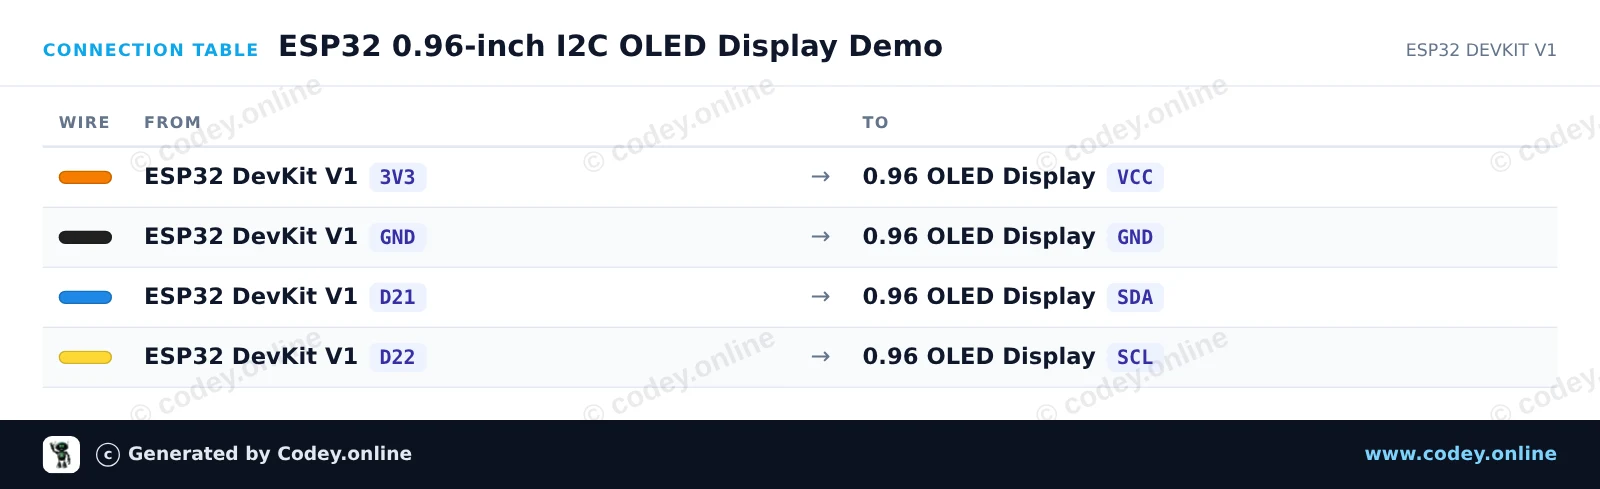
Tak podłączysz Mini wyświetlacz OLED wit 0.96 inch 128x64 I2C do Arduino UNO lub ESP32, z przykładowym szkicem, który możesz od razu wgrać.
Podłącz wyświetlacz OLED I2C 128x64 0,96 cala bezpośrednio do pinów I2C Arduino Uno (A4 dla SDA, A5 dla SCL). Ten sketch używa standardowych komend I2C do inicjalizacji kontrolera SSD1306 i wyświetla licznik na żywo oraz tekst bezpośrednio, bez potrzeby korzystania z zewnętrznych bibliotek graficznych.
/*
 * ==================================================================
 *  Generated by Codey.online  —  https://www.codey.online
 * ==================================================================
 *  Project   : 0.96-inch I2C OLED Display Demo
 *  Board     : Arduino UNO (arduino:avr:uno)
 *  Parts     : OLED Display 0.96 inch
 *  Libraries : none (built-in)
 *
 *  Codey Online is an AI-powered browser IDE for Arduino and ESP32.
 *  Describe your project and Codey writes the code, draws the wiring
 *  diagram and uploads it to your board, straight from the browser.
 *  This code is free to use, modify and share, without warranty.
 * ==================================================================
 */

#include <Wire.h>

const uint8_t OLED_ADDR = 0x3C;
const uint8_t OLED_WIDTH = 128;
const uint8_t OLED_HEIGHT = 64;
uint8_t buffer[1024];
int counter = 0;

const uint8_t font5x7[][5] = {
  {0x00, 0x00, 0x00, 0x00, 0x00}, // space
  {0x7E, 0x11, 0x11, 0x11, 0x7E}, // A
  {0x7F, 0x49, 0x49, 0x49, 0x36}, // B
  {0x3E, 0x41, 0x41, 0x41, 0x22}, // C
  {0x7F, 0x41, 0x41, 0x22, 0x1C}, // D
  {0x7F, 0x49, 0x49, 0x49, 0x41}, // E
  {0x7F, 0x09, 0x09, 0x09, 0x01}, // F
  {0x3E, 0x41, 0x49, 0x49, 0x7A}, // G
  {0x7F, 0x08, 0x08, 0x08, 0x7F}, // H
  {0x00, 0x41, 0x7F, 0x41, 0x00}, // I
  {0x7F, 0x40, 0x40, 0x40, 0x40}, // L
  {0x7F, 0x02, 0x0C, 0x02, 0x7F}, // M
  {0x7F, 0x04, 0x08, 0x10, 0x7F}, // N
  {0x3E, 0x41, 0x41, 0x41, 0x3E}, // O
  {0x7F, 0x09, 0x09, 0x09, 0x06}, // P
  {0x7F, 0x09, 0x19, 0x29, 0x46}, // R
  {0x46, 0x49, 0x49, 0x49, 0x31}, // S
  {0x01, 0x01, 0x7F, 0x01, 0x01}, // T
  {0x3F, 0x40, 0x40, 0x40, 0x3F}, // U
  {0x3E, 0x51, 0x49, 0x45, 0x3E}, // 0
  {0x00, 0x42, 0x7F, 0x40, 0x00}, // 1
  {0x42, 0x61, 0x51, 0x49, 0x46}, // 2
  {0x21, 0x41, 0x45, 0x4B, 0x31}, // 3
  {0x18, 0x14, 0x12, 0x7F, 0x10}, // 4
  {0x27, 0x45, 0x45, 0x45, 0x39}, // 5
  {0x3C, 0x4A, 0x49, 0x49, 0x30}, // 6
  {0x01, 0x71, 0x09, 0x05, 0x03}, // 7
  {0x36, 0x49, 0x49, 0x49, 0x36}, // 8
  {0x06, 0x49, 0x49, 0x29, 0x1E}, // 9
  {0x00, 0x36, 0x36, 0x00, 0x00}, // :
  {0x00, 0x60, 0x60, 0x00, 0x00}  // .
};

int charIndex(char c) {
  if (c >= 'a' && c <= 'z') c -= 32;
  if (c == ' ') return 0;
  if (c == 'A') return 1; if (c == 'B') return 2; if (c == 'C') return 3;
  if (c == 'D') return 4; if (c == 'E') return 5; if (c == 'F') return 6;
  if (c == 'G') return 7; if (c == 'H') return 8; if (c == 'I') return 9;
  if (c == 'L') return 10; if (c == 'M') return 11; if (c == 'N') return 12;
  if (c == 'O') return 13; if (c == 'P') return 14; if (c == 'R') return 15;
  if (c == 'S') return 16; if (c == 'T') return 17; if (c == 'U') return 18;
  if (c >= '0' && c <= '9') return 19 + (c - '0');
  if (c == ':') return 29;
  if (c == '.') return 30;
  return 0;
}

void sendCmd(uint8_t cmd) {
  Wire.beginTransmission(OLED_ADDR);
  Wire.write(0x00);
  Wire.write(cmd);
  Wire.endTransmission();
}

void sendCmd2(uint8_t cmd, uint8_t val) {
  Wire.beginTransmission(OLED_ADDR);
  Wire.write(0x00);
  Wire.write(cmd);
  Wire.write(val);
  Wire.endTransmission();
}

void clearDisplay() {
  memset(buffer, 0, sizeof(buffer));
}

void setPixel(int x, int y, bool state) {
  if (x < 0 || x >= OLED_WIDTH || y < 0 || y >= OLED_HEIGHT) return;
  int idx = x + (y / 8) * OLED_WIDTH;
  if (state) buffer[idx] |= (1 << (y % 8));
  else buffer[idx] &= ~(1 << (y % 8));
}

void printText(int x, int y, const char* str) {
  while (*str) {
    int idx = charIndex(*str++);
    for (int col = 0; col < 5; col++) {
      uint8_t line = font5x7[idx][col];
      for (int row = 0; row < 7; row++) {
        setPixel(x + col, y + row, (line >> row) & 1);
      }
    }
    x += 6;
  }
}

void updateDisplay() {
  sendCmd(0x20); sendCmd(0x00);
  sendCmd2(0x21, 0x00); sendCmd(0x7F);
  sendCmd2(0x22, 0x00); sendCmd(0x07);
  for (uint16_t i = 0; i < 1024; i += 16) {
    Wire.beginTransmission(OLED_ADDR);
    Wire.write(0x40);
    for (uint8_t j = 0; j < 16; j++) {
      Wire.write(buffer[i + j]);
    }
    Wire.endTransmission();
  }
}

void setup() {
  Serial.begin(115200);
  Wire.begin();
  delay(50);
  sendCmd(0xAE); sendCmd2(0xD5, 0x80); sendCmd2(0xA8, 0x3F);
  sendCmd2(0xD3, 0x00); sendCmd(0x40); sendCmd2(0x8D, 0x14);
  sendCmd(0xA1); sendCmd(0xC8); sendCmd2(0xDA, 0x12);
  sendCmd2(0x81, 0xCF); sendCmd2(0xD9, 0xF1); sendCmd2(0xDB, 0x40);
  sendCmd(0xA4); sendCmd(0xA6); sendCmd(0xAF);
  Serial.println(F("OLED Initialized"));
}

void loop() {
  clearDisplay();
  printText(0, 0, "OLED 0.96 INCH");
  printText(0, 16, "ARDUINO UNO");

  char buf[16];
  itoa(counter, buf, 10);
  printText(0, 32, "COUNT: ");
  printText(42, 32, buf);

  int barWidth = (counter % 120);
  for (int x = 0; x <= barWidth; x++) {
    for (int y = 48; y < 58; y++) {
      setPixel(x, y, true);
    }
  }

  updateDisplay();
  counter++;
  delay(100);
}Wiring diagram and example code generated by Codey.online — https://www.codey.online
Ten projekt pokazuje, jak podłączyć i wyświetlać tekst oraz liczby na ekranie OLED I2C 0.96-inch za pomocą ESP32. Szkic inicjalizuje wyświetlacz i aktualizuje licznik na żywo co sekundę. Przed wgraniem upewnij się, że zainstalowano biblioteki Adafruit SSD1306 i Adafruit GFX.
/*
 * ==================================================================
 *  Generated by Codey.online  —  https://www.codey.online
 * ==================================================================
 *  Project   : ESP32 0.96-inch I2C OLED Display Demo
 *  Board     : ESP32 DEVKIT V1 (esp32:esp32:esp32doit-devkit-v1)
 *  Parts     : OLED Display 0.96 inch
 *  Libraries : Adafruit SSD1306 2.5.16, Adafruit GFX Library 1.12.6
 *
 *  Codey Online is an AI-powered browser IDE for Arduino and ESP32.
 *  Describe your project and Codey writes the code, draws the wiring
 *  diagram and uploads it to your board, straight from the browser.
 *  This code is free to use, modify and share, without warranty.
 * ==================================================================
 */

#include <Wire.h>
#include <Adafruit_GFX.h>
#include <Adafruit_SSD1306.h>

#define SCREEN_WIDTH 128
#define SCREEN_HEIGHT 64
#define OLED_RESET    -1
#define SCREEN_ADDRESS 0x3C

Adafruit_SSD1306 display(SCREEN_WIDTH, SCREEN_HEIGHT, &Wire, OLED_RESET);

int counter = 0;

void setup() {
  Serial.begin(115200);

  // Initialize I2C on ESP32 default pins (SDA: 21, SCL: 22)
  Wire.begin(21, 22);

  if (!display.begin(SSD1306_SWITCHCAPVCC, SCREEN_ADDRESS)) {
    Serial.println(F("SSD1306 allocation failed"));
    while (true); // Freeze
  }

  display.clearDisplay();
  display.setTextColor(SSD1306_WHITE);
  display.setTextSize(1);
  display.setCursor(0, 0);
  display.println("ESP32 OLED Test");
  display.display();
  delay(1500);
}

void loop() {
  display.clearDisplay();

  // Header text
  display.setTextSize(1);
  display.setCursor(0, 0);
  display.println("ESP32 + SSD1306");

  // Separator line
  display.drawLine(0, 12, 127, 12, SSD1306_WHITE);

  // Counter display
  display.setCursor(0, 20);
  display.println("Counter value:");

  display.setTextSize(2);
  display.setCursor(0, 36);
  display.print(counter);

  display.display();

  counter++;
  delay(1000);
}Wymagane biblioteki: Adafruit SSD1306 2.5.16, Adafruit GFX Library 1.12.6
Wiring diagram and example code generated by Codey.online — https://www.codey.online





 English
  Nederlands
  Frans
Frans  Deutsch
  Italiano
  Español
  Suomi
Suomi  Dansk
Dansk  Ελληνικά
  Български
  Čeština
  Hrvatski
  Svenska
  Aileen